Epic Charging enables efficient ticket management and improves the customer experience through seamless issue tracking.
The ‘Tickets’ feature allows users to create and track support tickets directly from the Dashboard. By integrating with a ticketing system such as Zendesk and others, this feature ensures smooth and efficient issue tracking and resolution.
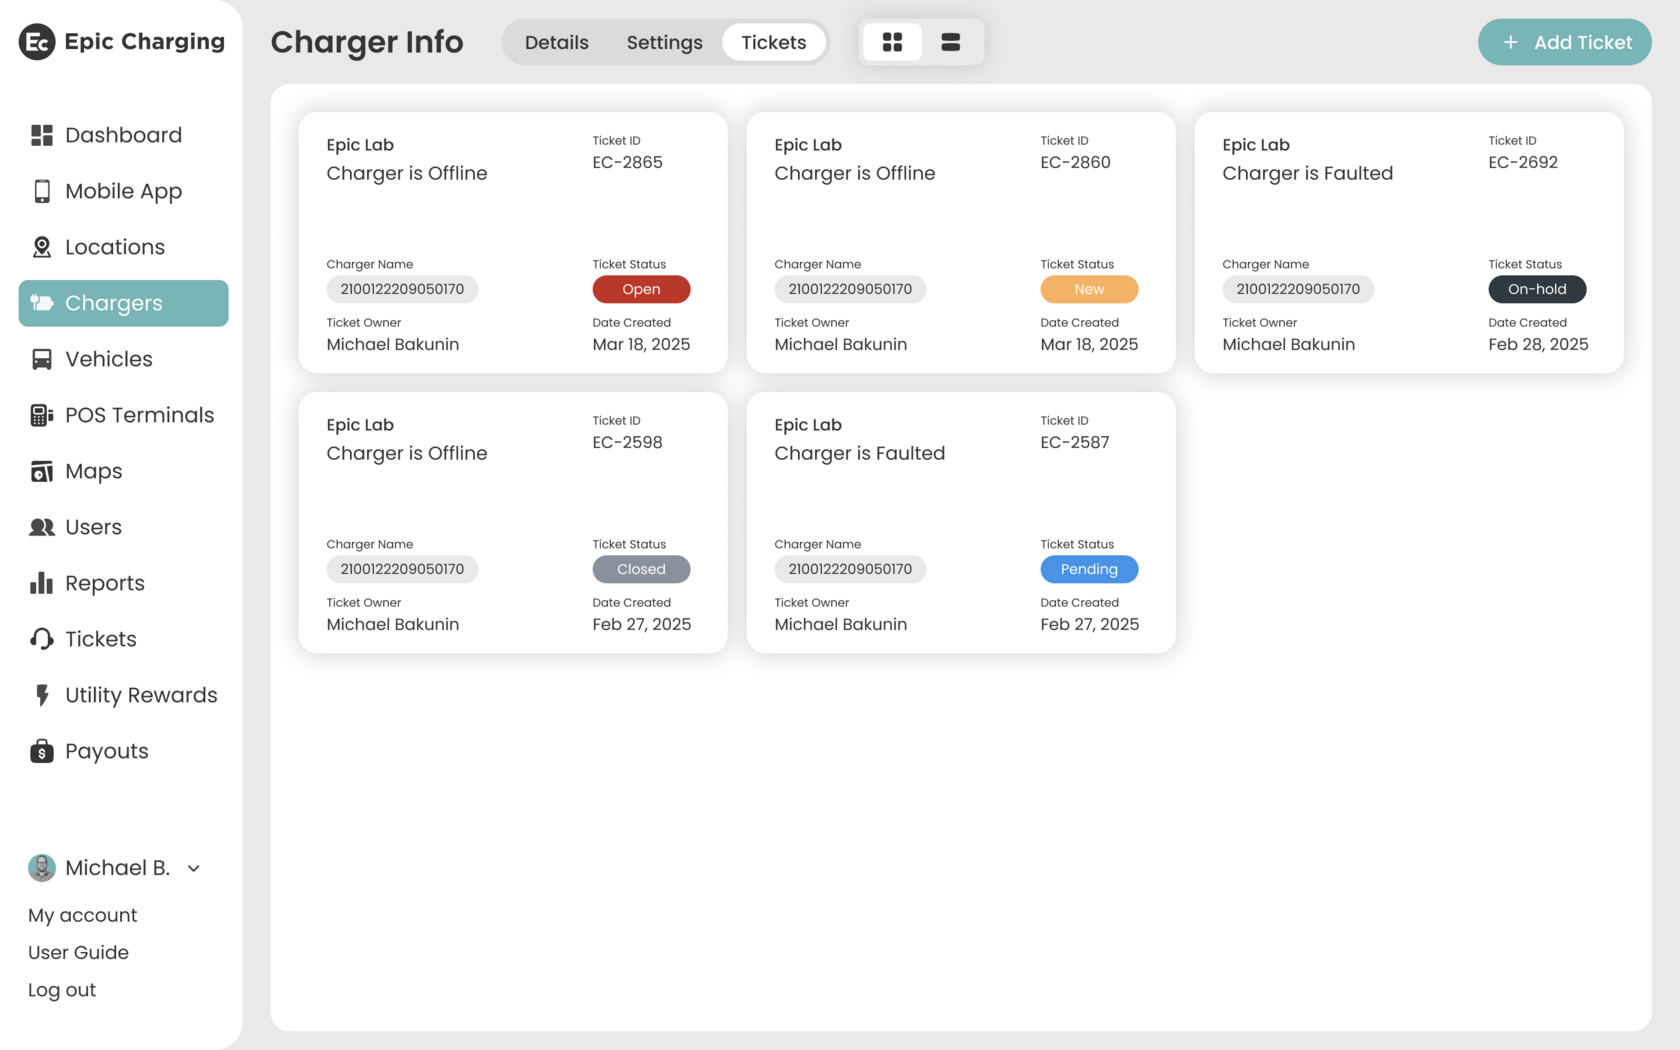
Tickets can be filtered, searched, and viewed in different formats for easy access.
1. Start by navigating to the 'Tickets' tab within your Epic account.
The ‘Tickets’ feature allows users to create and track support tickets directly from the Dashboard. By integrating with a ticketing system such as Zendesk and others, this feature ensures smooth and efficient issue tracking and resolution.
Tickets can be filtered, searched, and viewed in different formats for easy access.
1. Start by navigating to the 'Tickets' tab within your Epic account.
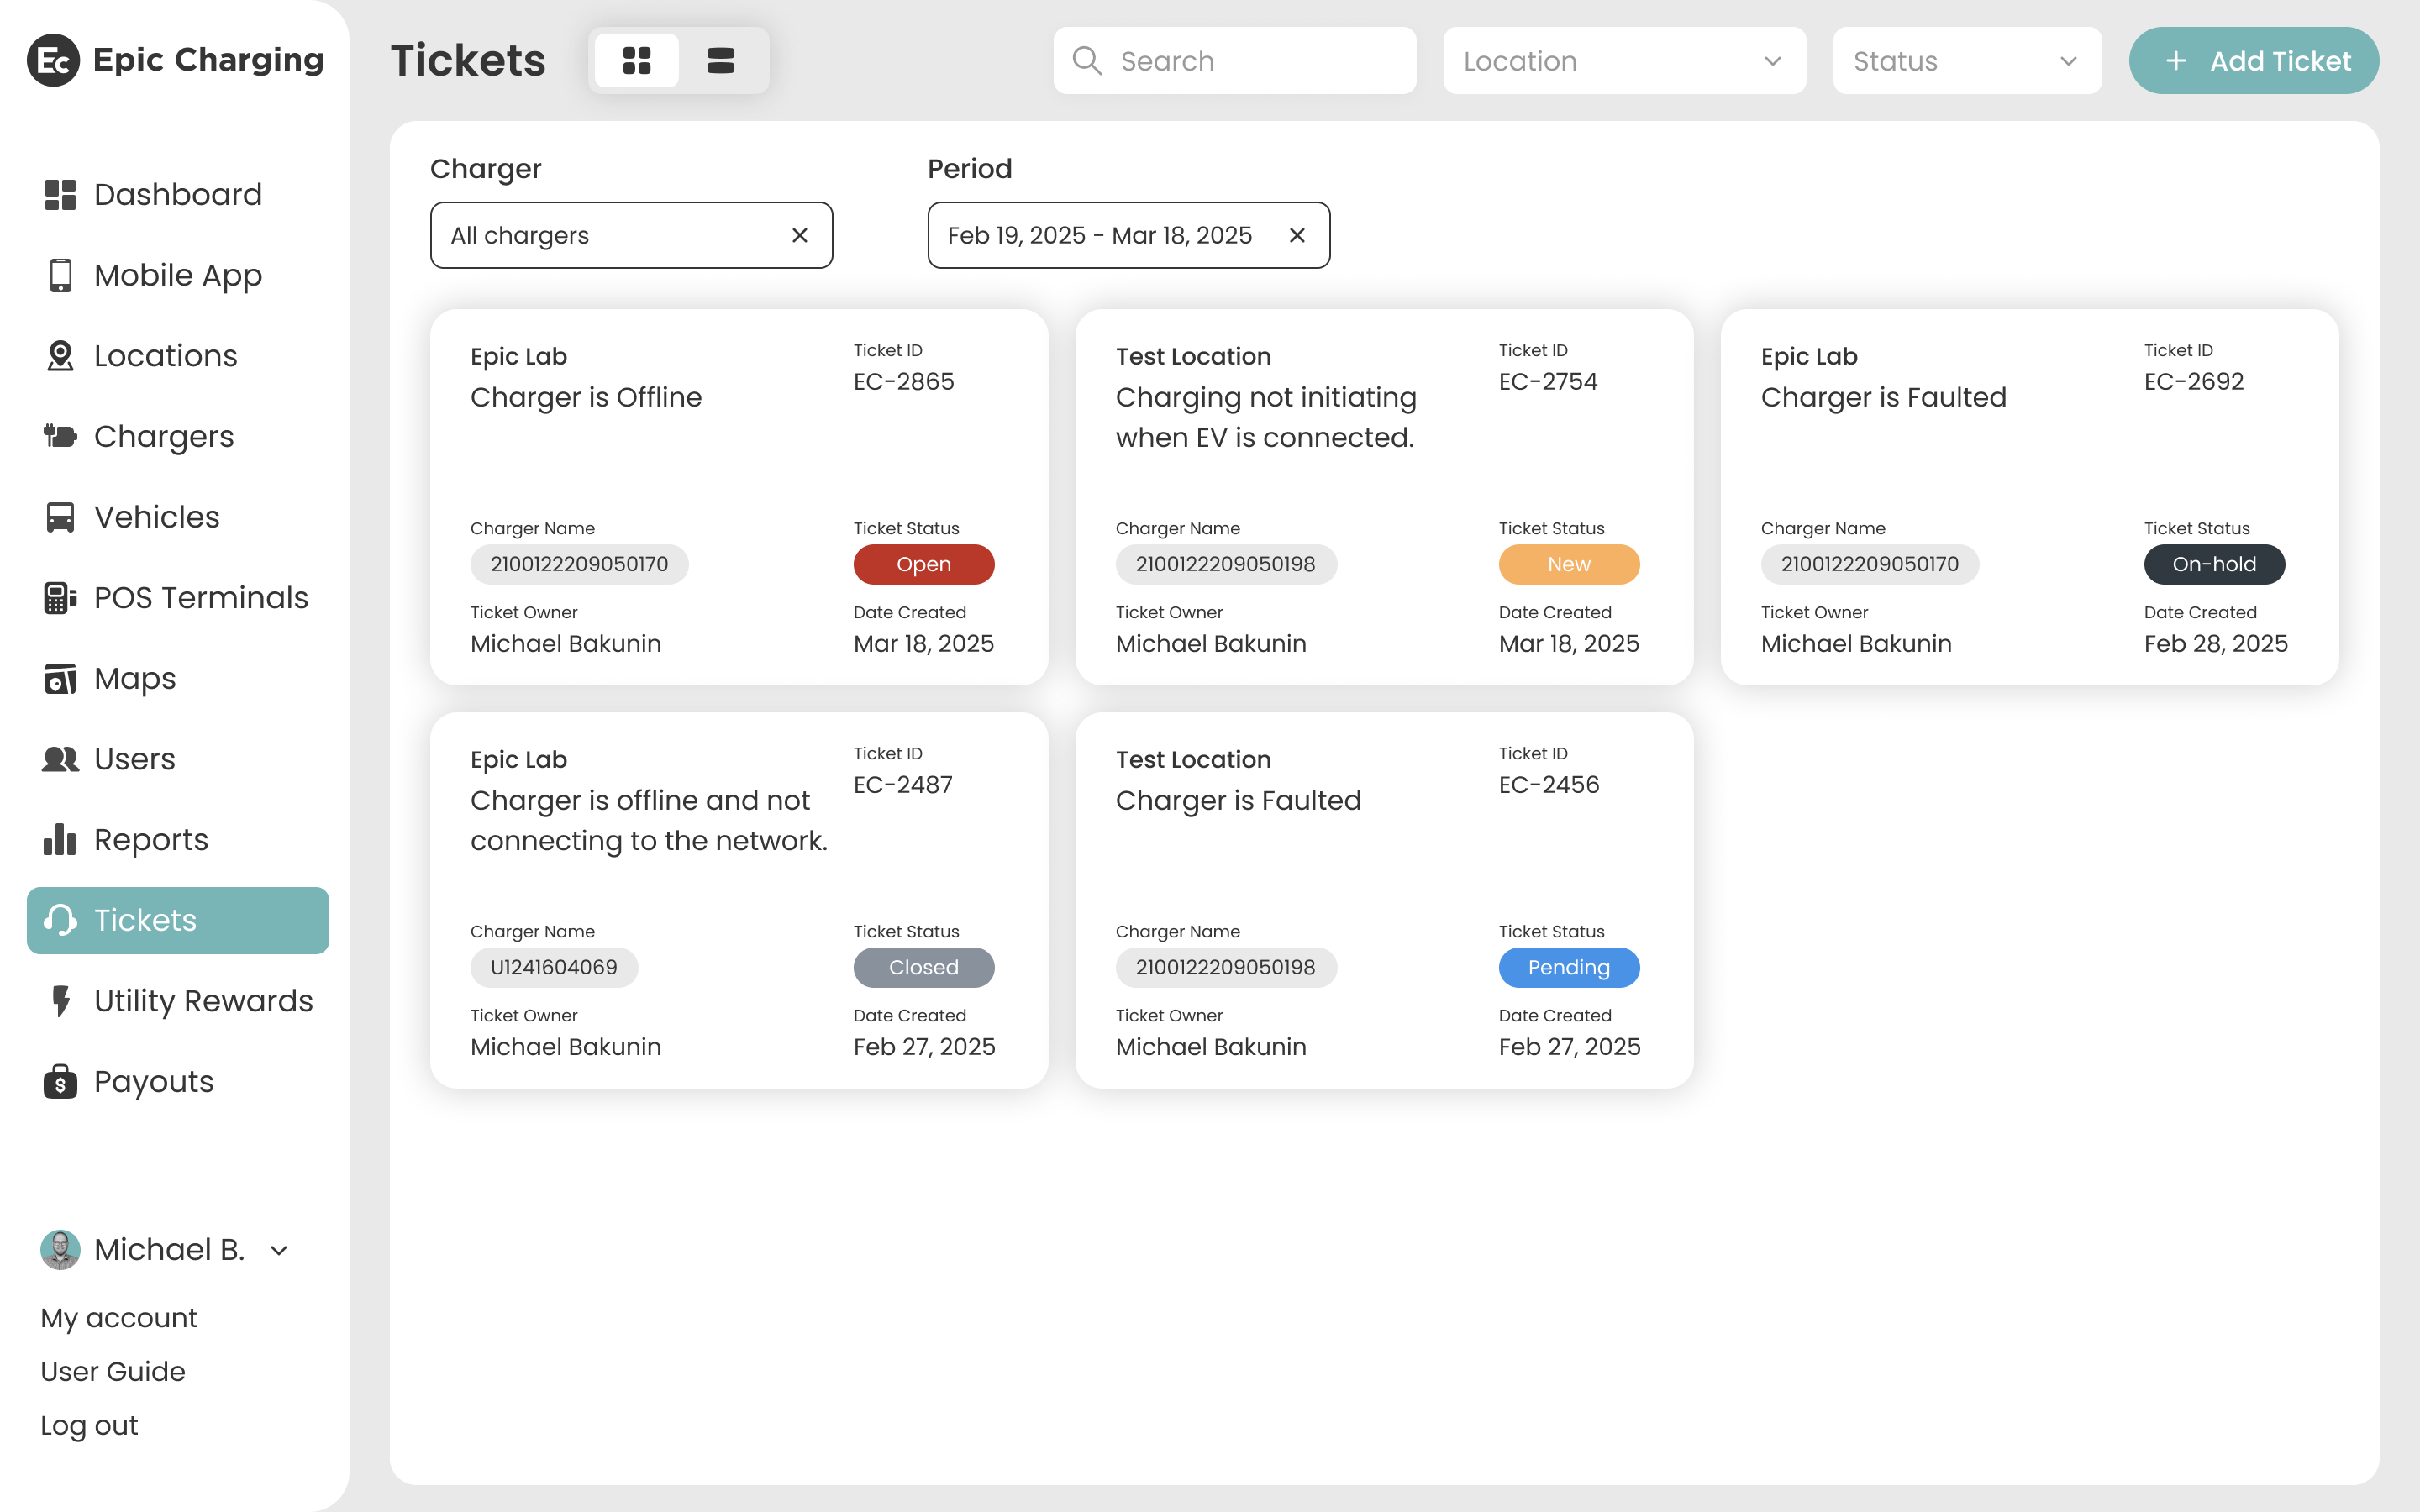
2. Use the toggle button at the top of the tab to switch between two view options:
- Grid View – visually organized cards for each ticket.
- Rows View – a table format for a more compact display.
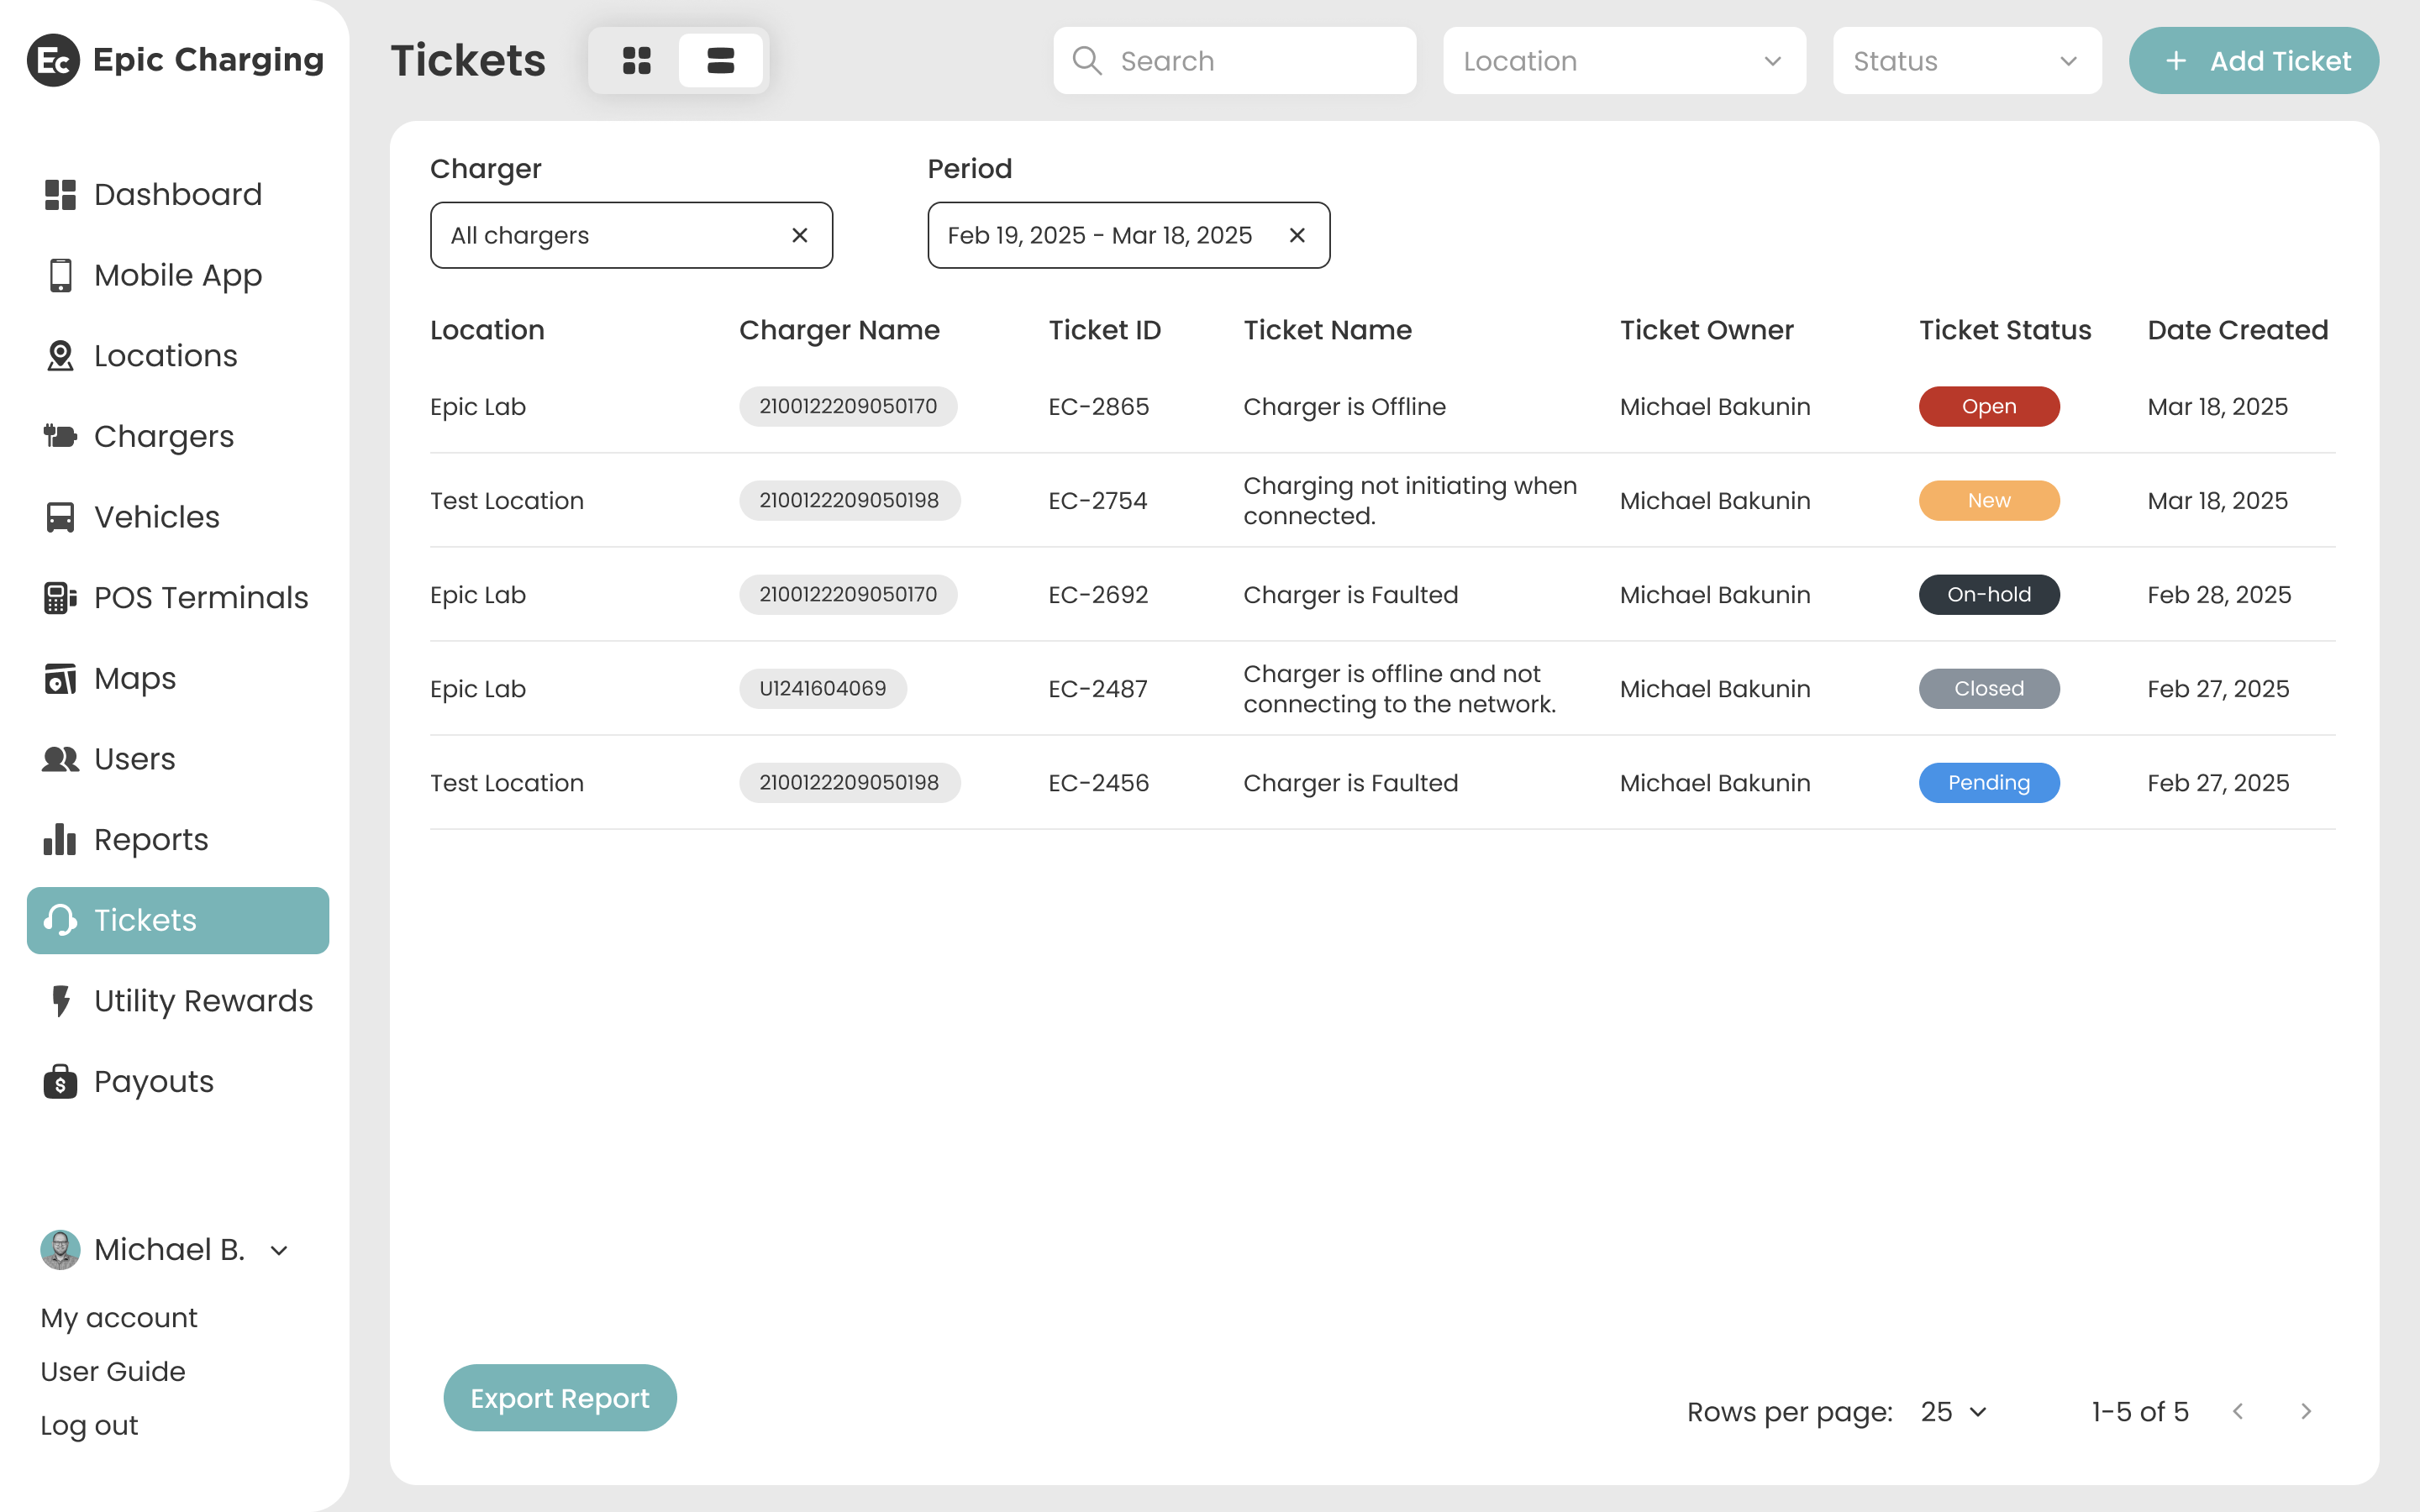
3. Use the Search field to quickly find tickets by ticket name.
4. To add a ticket, click the ‘+ Add Ticket’ button.
5. Fill out the required information: Location, Ticket Name, Ticket Description. Choose a ticket category from the dropdown list and select the ticket priority. The “Charger Name” field is optional – fill it in only if the issue is related to a specific charger.
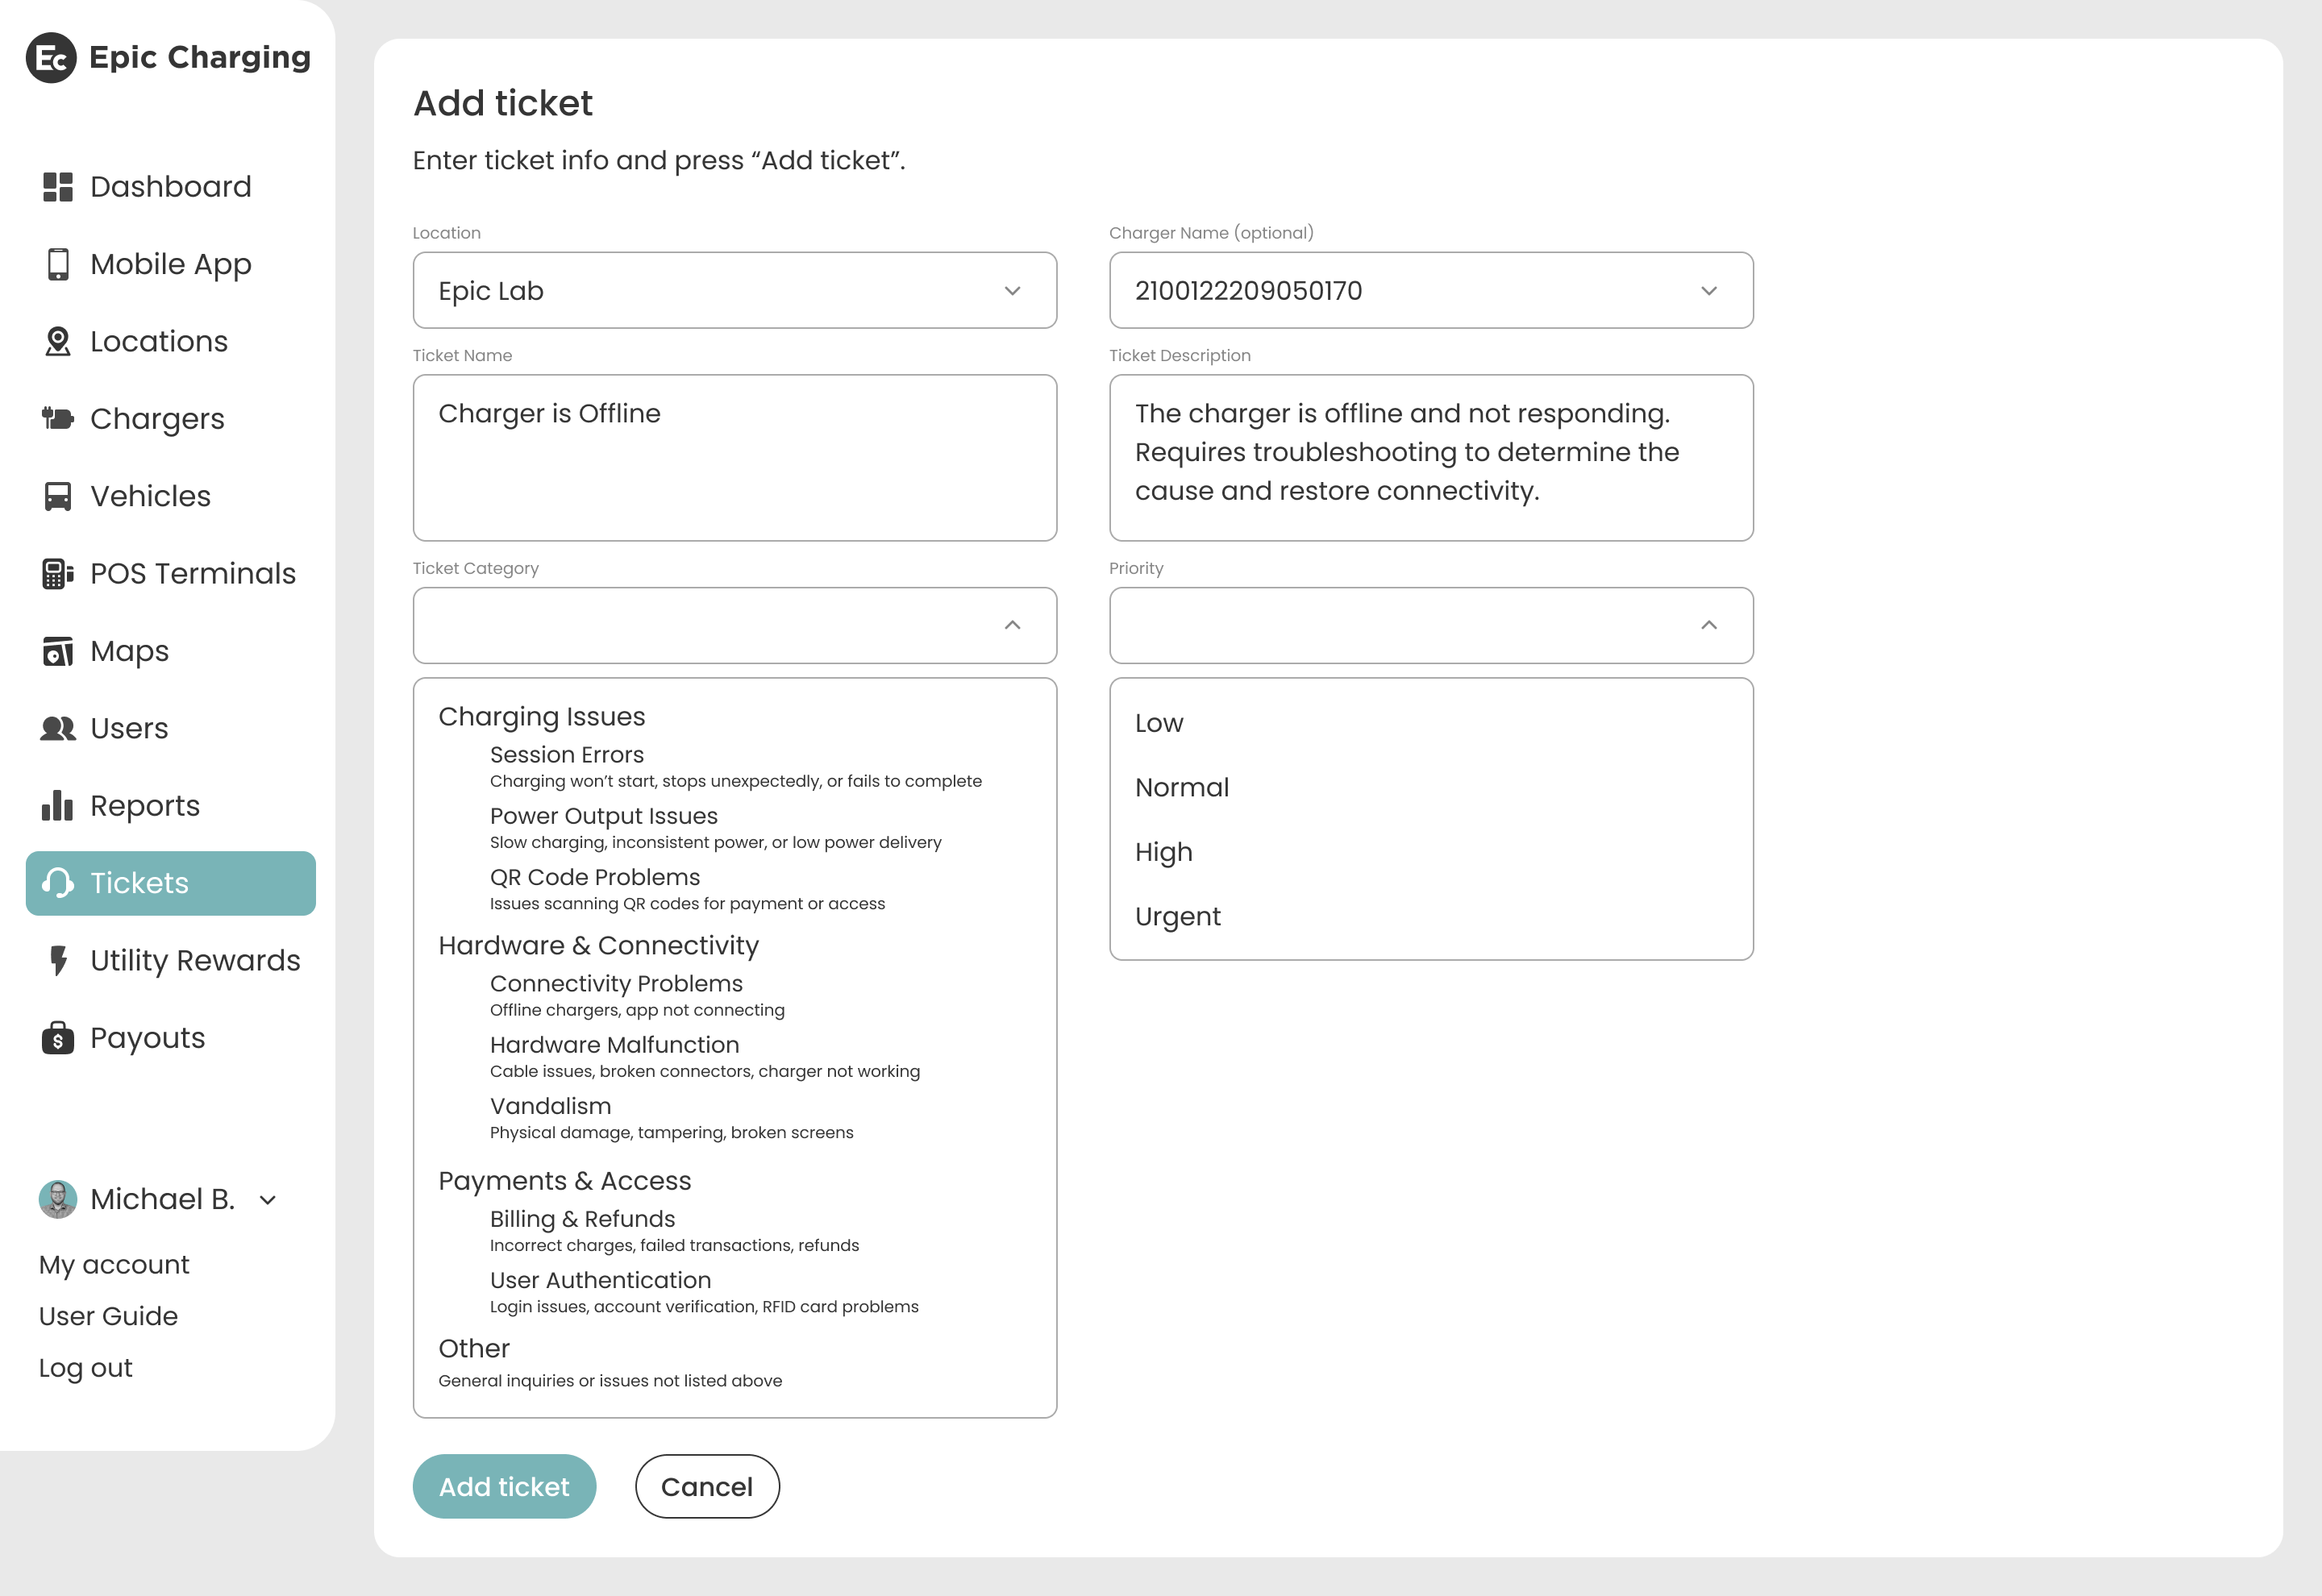
6. Click on the 'Add ticket' button to create the ticket. The ticket will be added to the ‘Tickets’ tab in the Dashboard and synced with Epic’s Zendesk account by default. The “Ticket Owner” will be assigned automatically, and the logged-in user who created the ticket from the Dashboard will be registered as the “Reporter”.
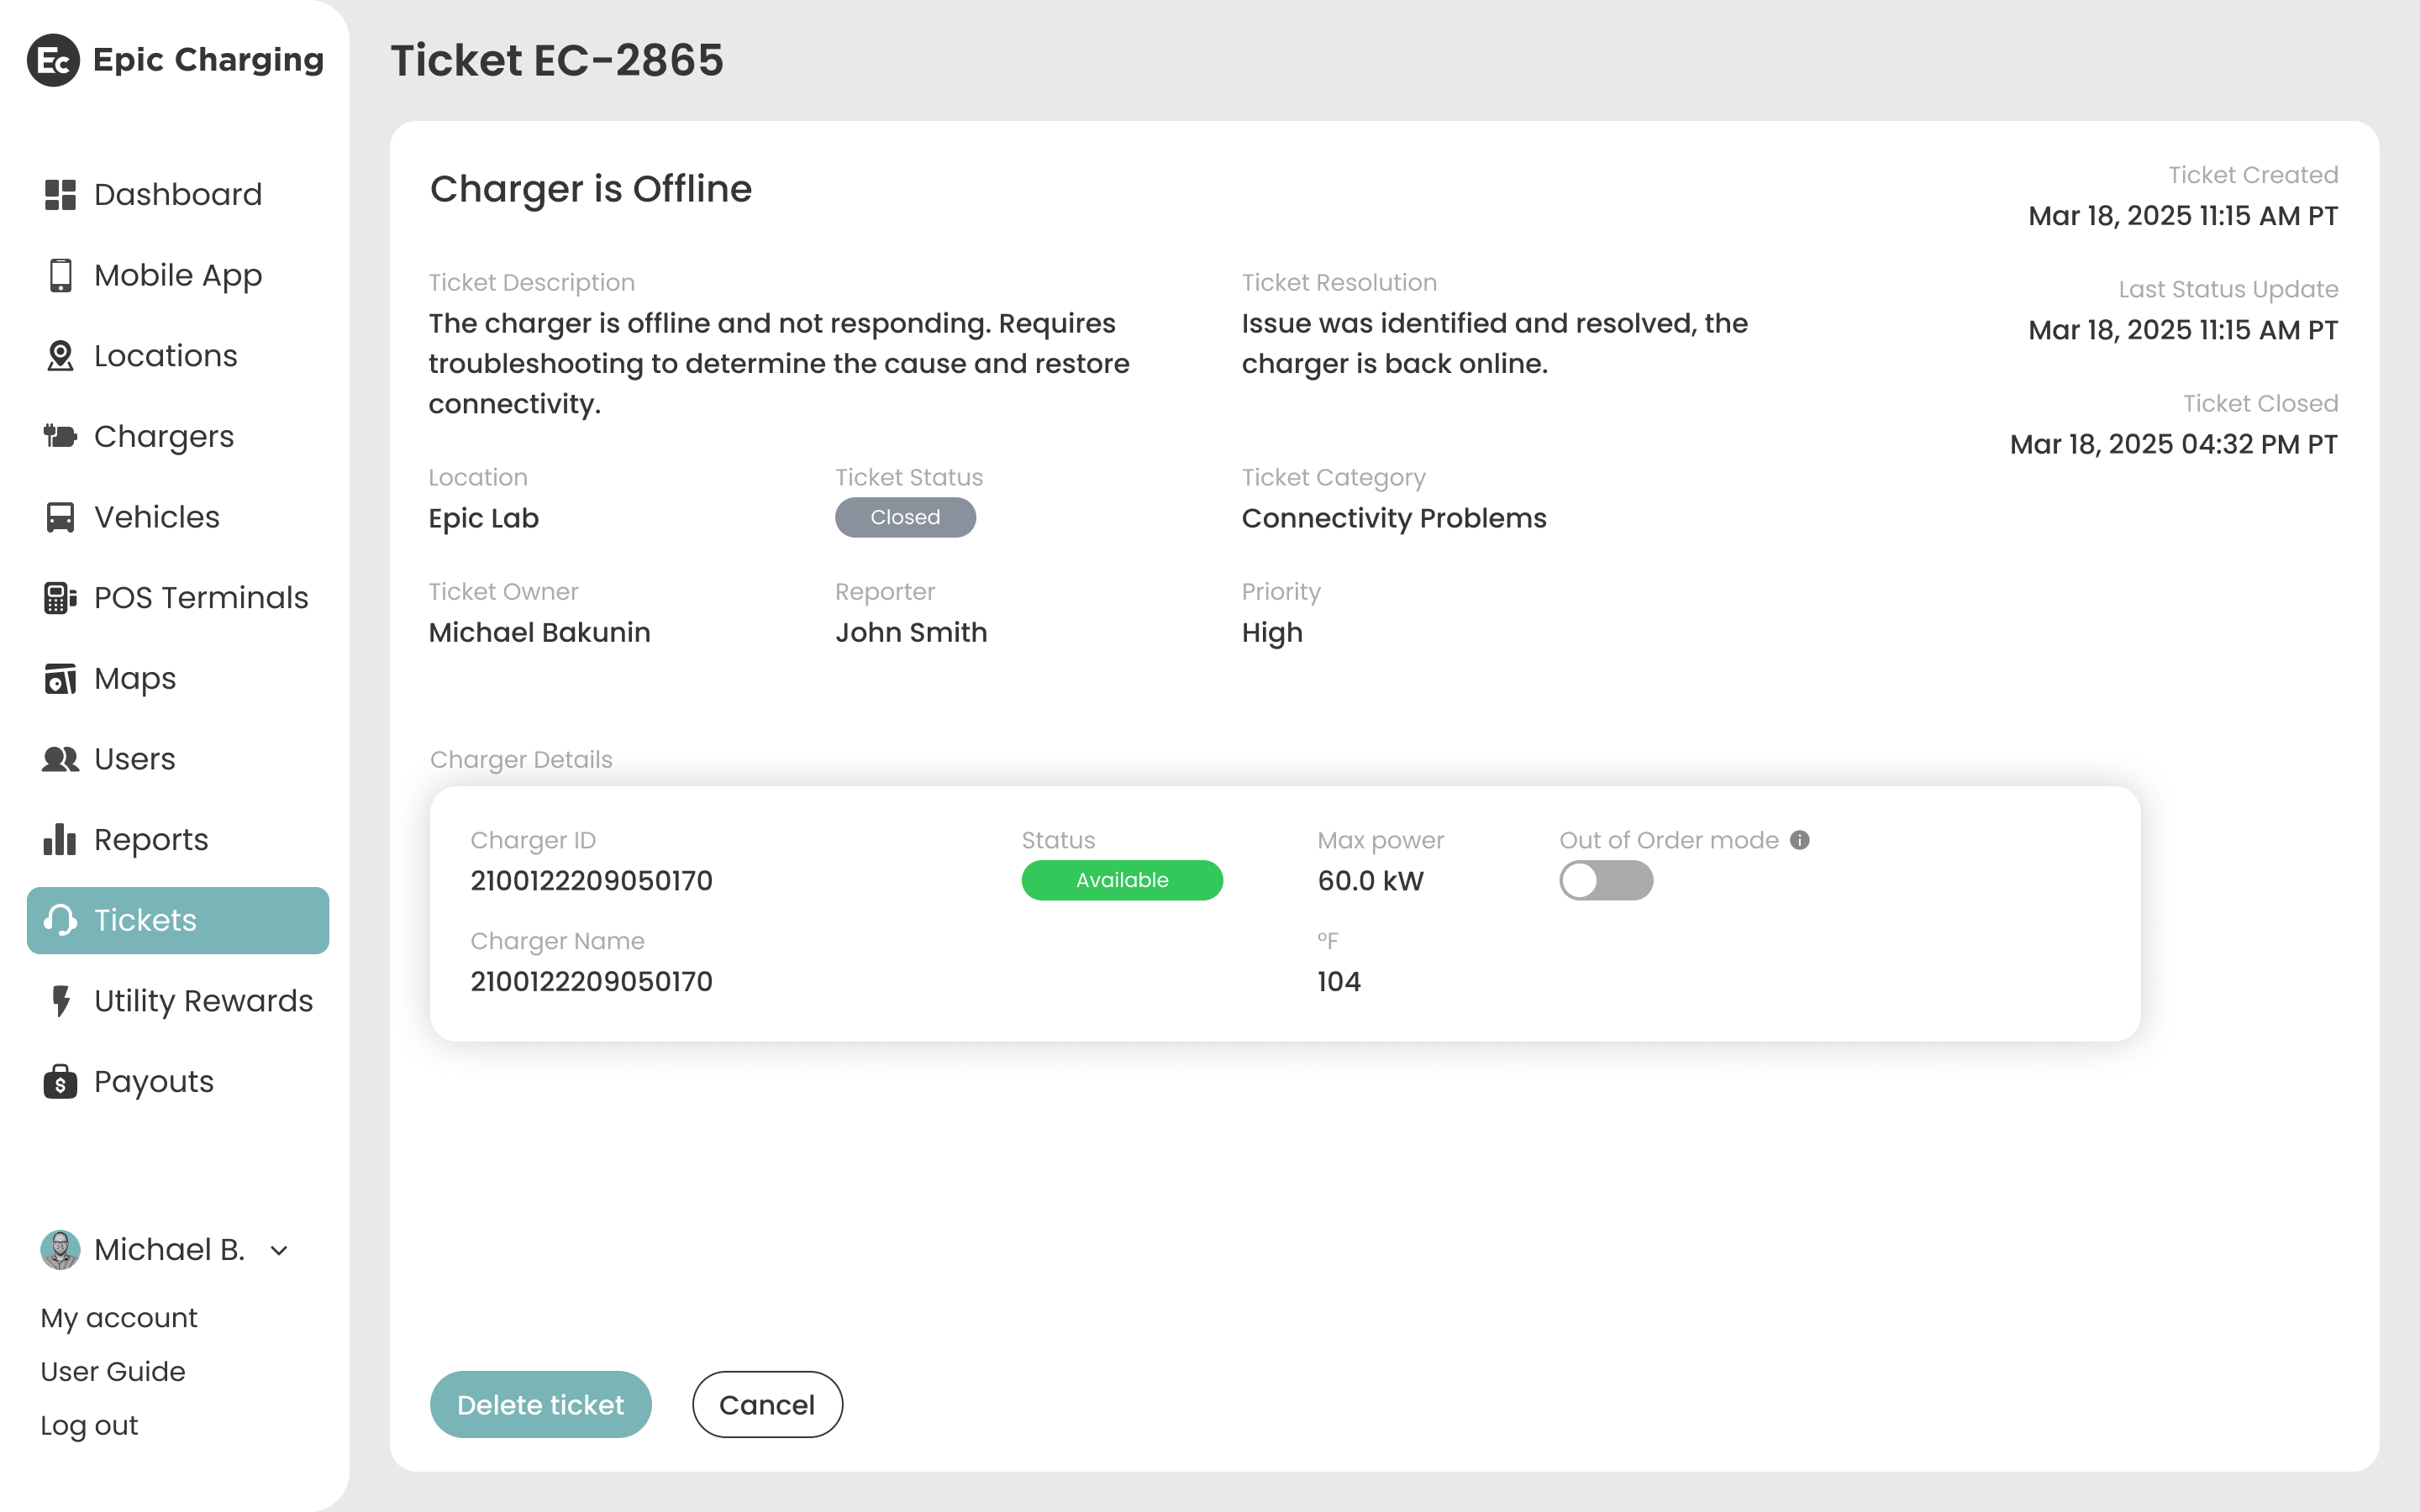
The “Charger Details” widget is only displayed if the ticket is linked to a specific charger. Click on it to be redirected to the Charger Settings.
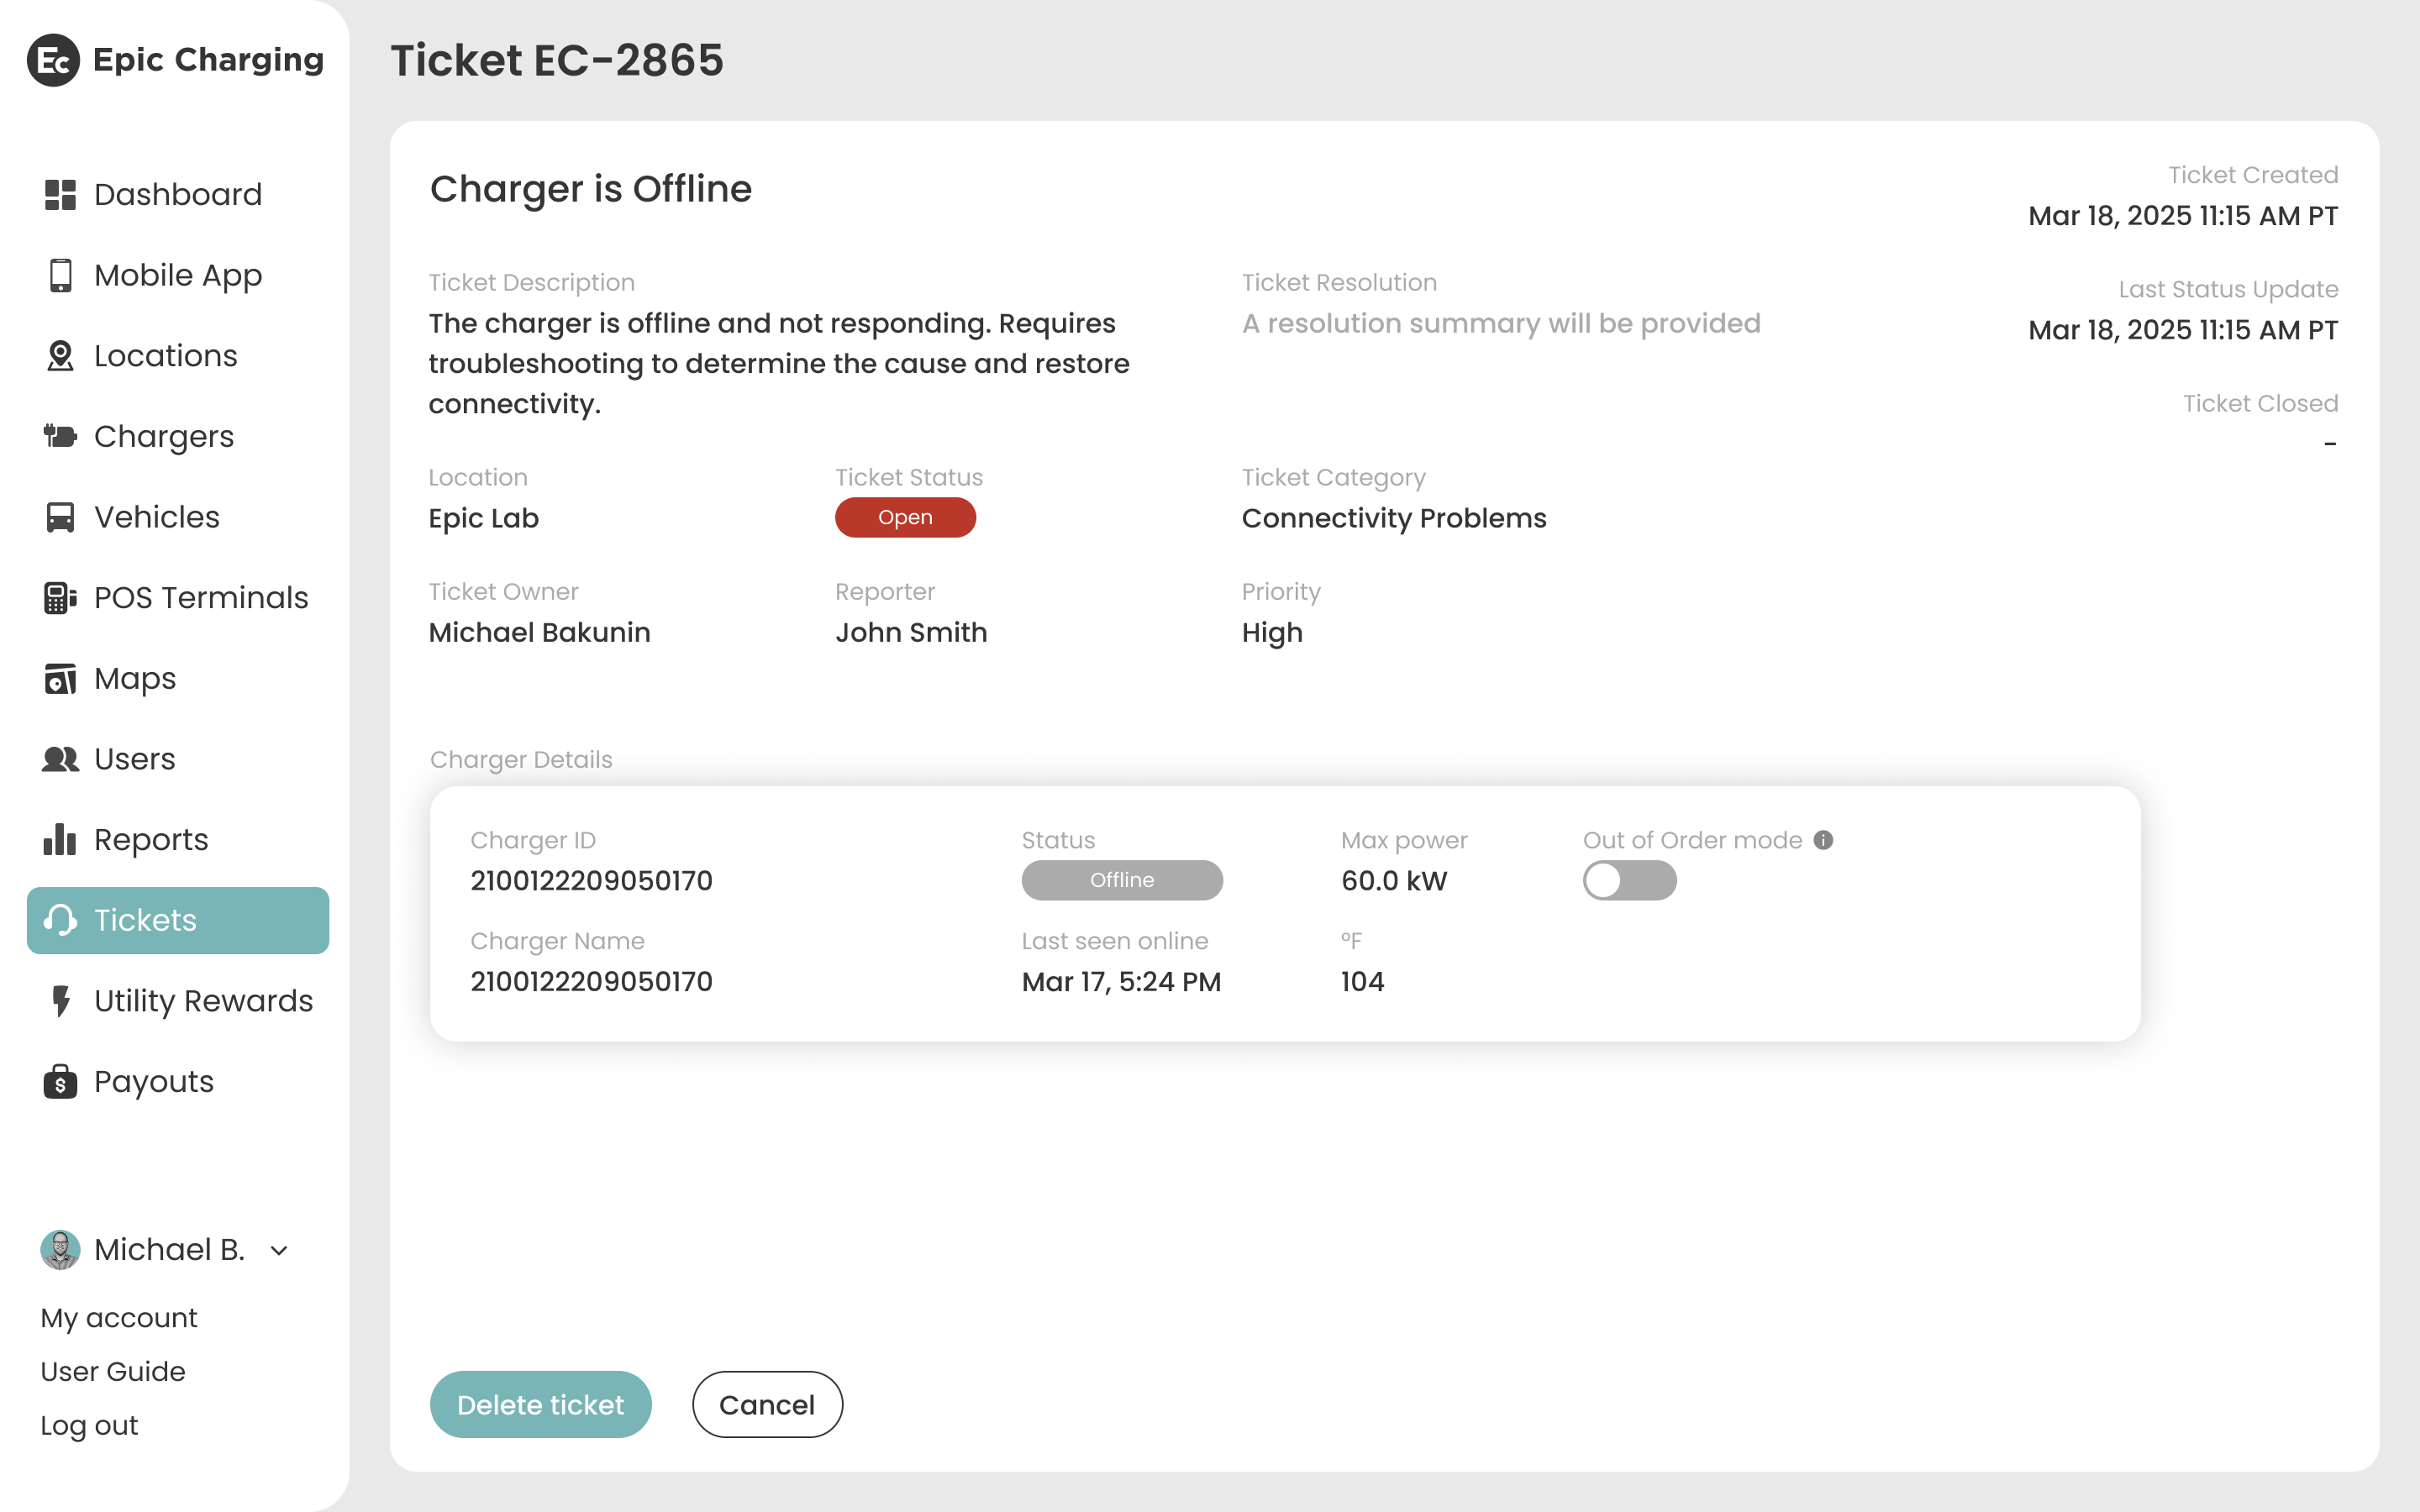
7. The “Ticket Status” remains synchronized with Zendesk. Any updates to the ticket status in Zendesk will be reflected in the Dashboard, along with the “Ticket Resolution” field.
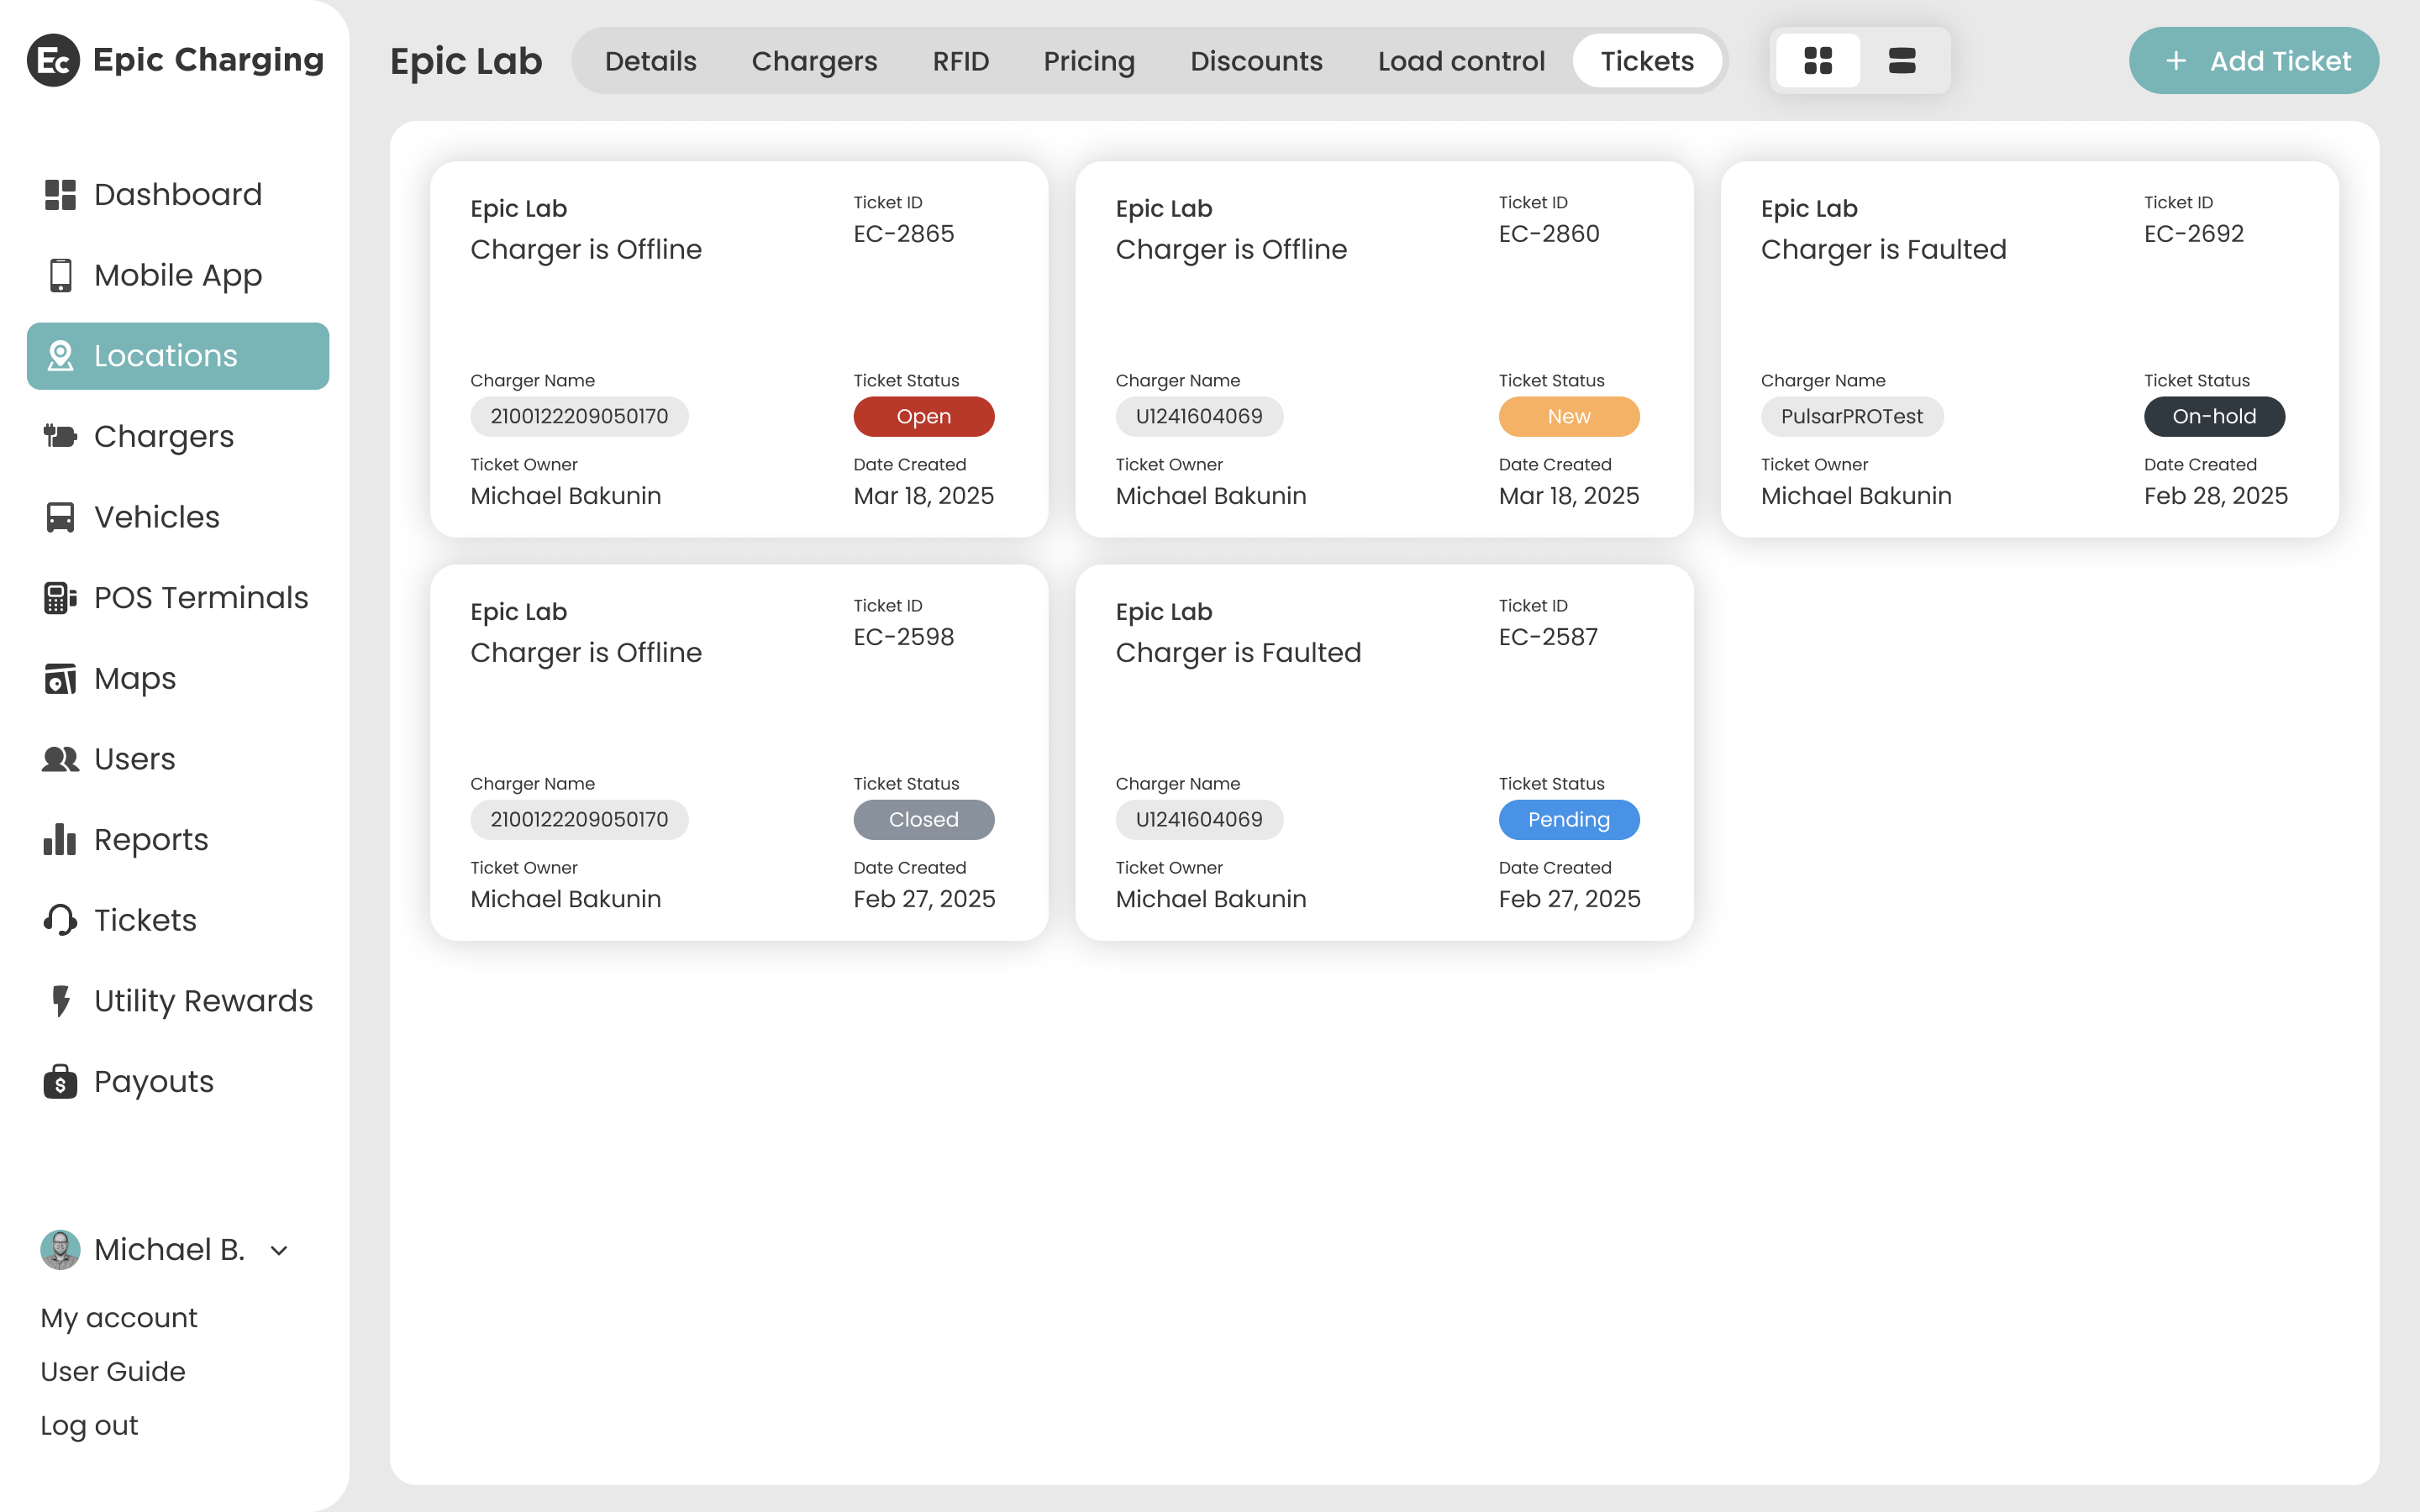
8. Navigate to the specific Charger and select the ‘Tickets’ tab to view tickets associated with that charger.
9. Navigate to the specific Location and select the ‘Tickets’ tab to view tickets associated with that location.