
Epic Charging provides the ability to link SIM cards directly to individual chargers or assign them at the location level to manage multiple chargers. An additional benefit is that you can check the SIM card activation status and have the flexibility to change the cellular provider to improve connectivity. This setup ensures that each charger or location has the required connectivity for optimal performance.
Linking SIM Cards to Chargers
1. Start by navigating to the 'Chargers' tab.
2. Select the charger you want to link the SIM card to and go to "Charger Settings".
Linking SIM Cards to Chargers
1. Start by navigating to the 'Chargers' tab.
2. Select the charger you want to link the SIM card to and go to "Charger Settings".
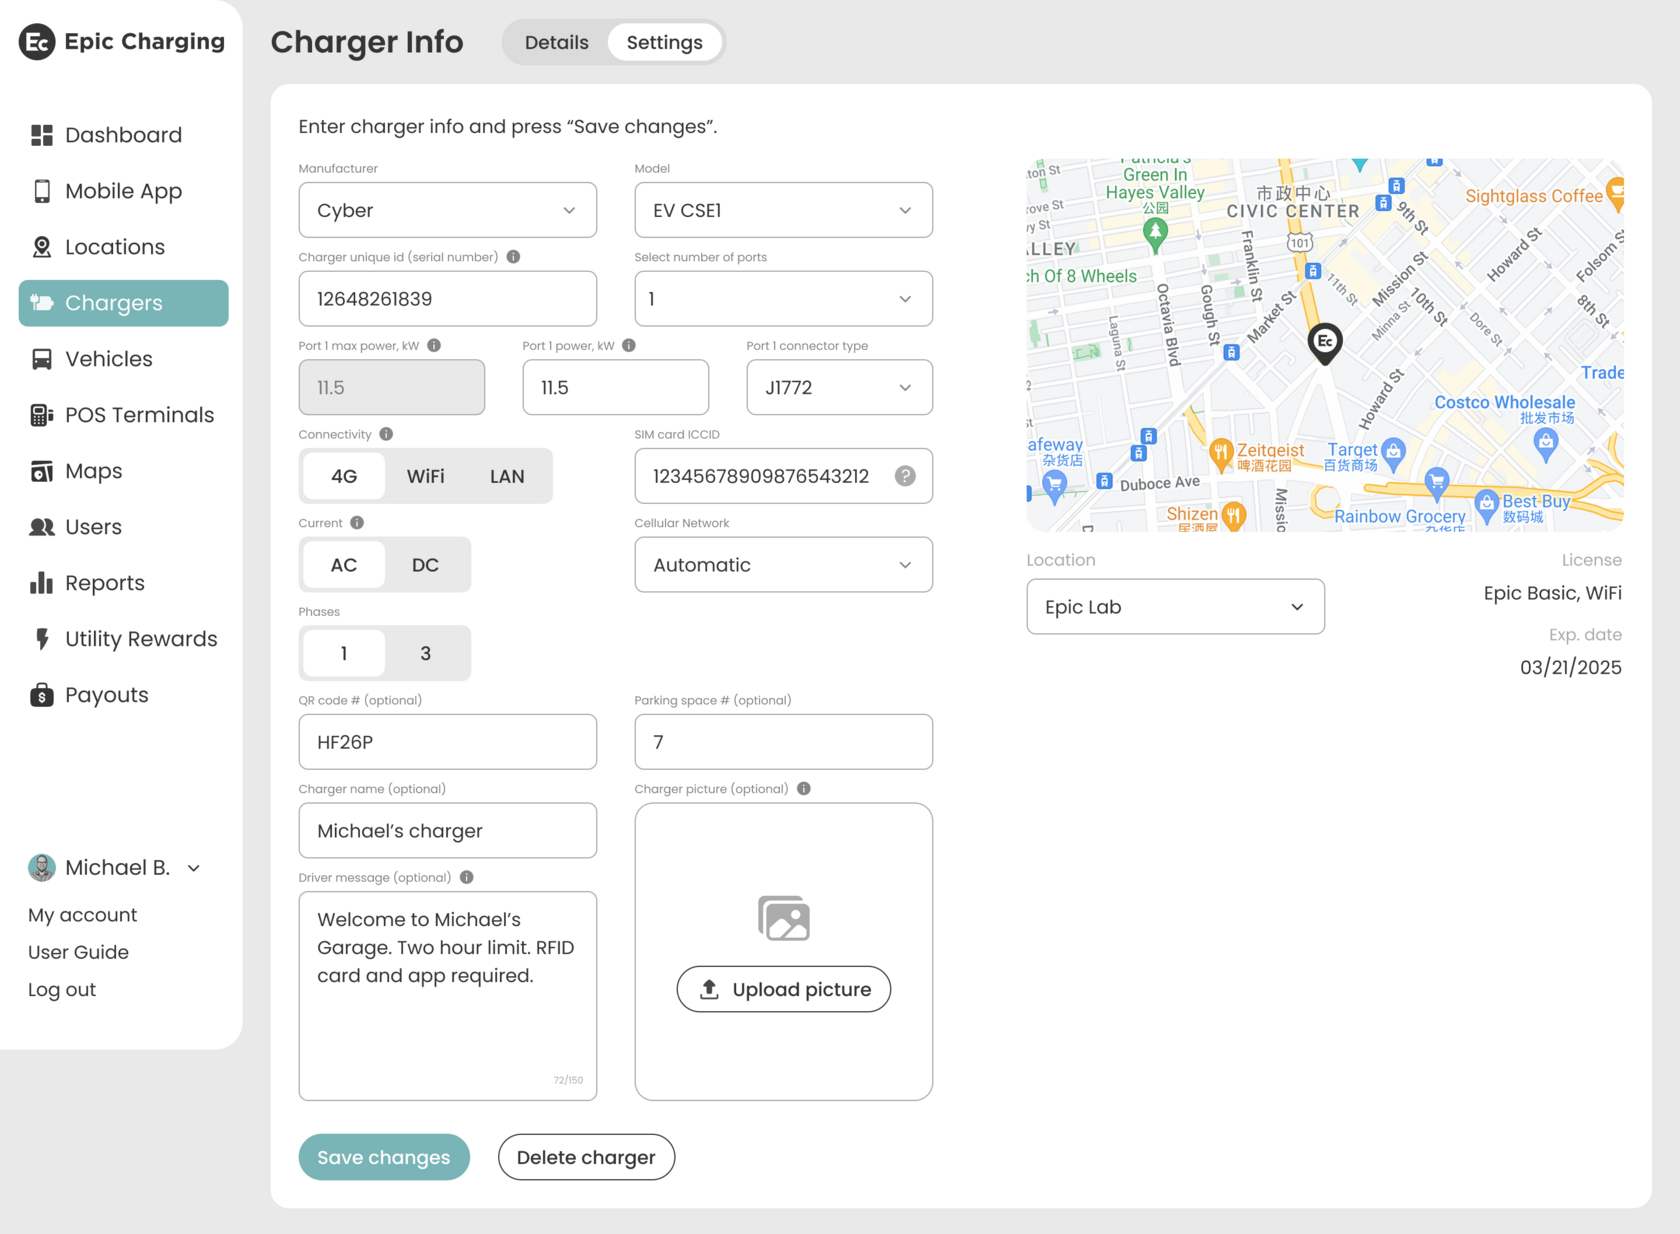
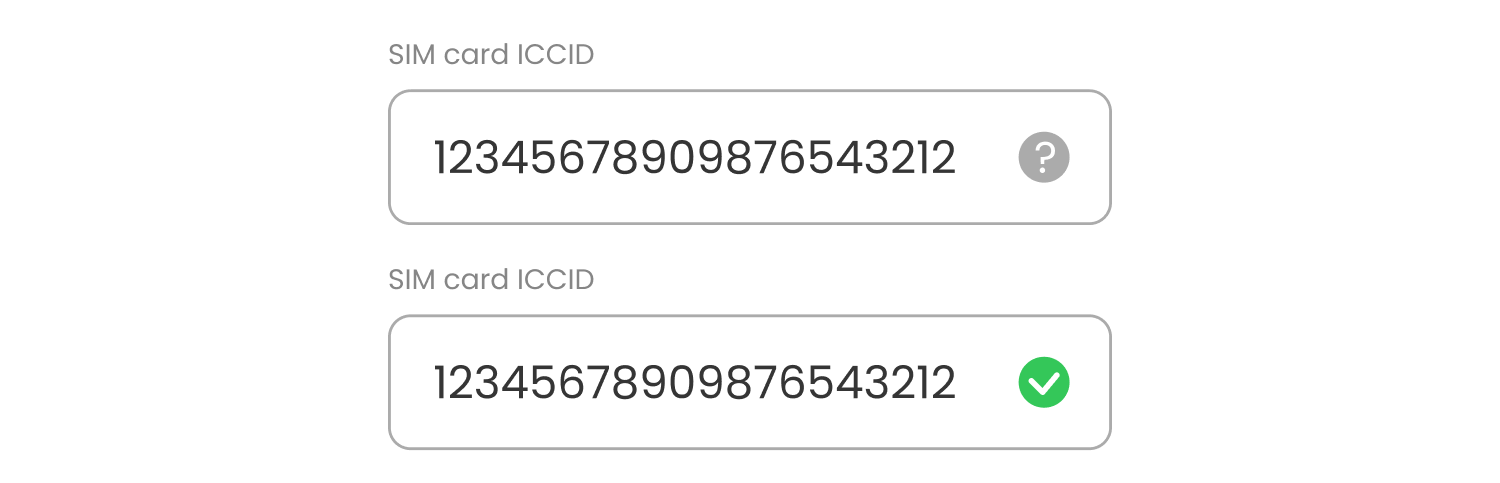
3. Choose the 4G connectivity option as a connectivity method for the charger. You will need to enter the SIM card ICCID. A gray question mark near the SIM card number means that SIM card is not active. After the SIM card has been activated via the API, the SIM card status will automatically change to ‘active’.
4. By default, Automatic is selected as a cellular network option. If you are in the US or Canada, you can select a carrier from the dropdown menu.
5. Click on the "Save changes" button to activate 4G connectivity for the charger.
Linking SIM Cards to Locations
1. Start by navigating to the 'Locations' tab.
2. Select the Location where you want to link the SIM card and go to "Location Details".
3. Navigate to the "Connectivity" section. At each location, you can have multiple routers to provide network coverage for multiple chargers. Each router at a location is identified by a unique serial number and linked to a single SIM card. Locate the serial number on the physical router device (typically 10-12 digits and/or letters) and enter it in the "Router serial number" field.
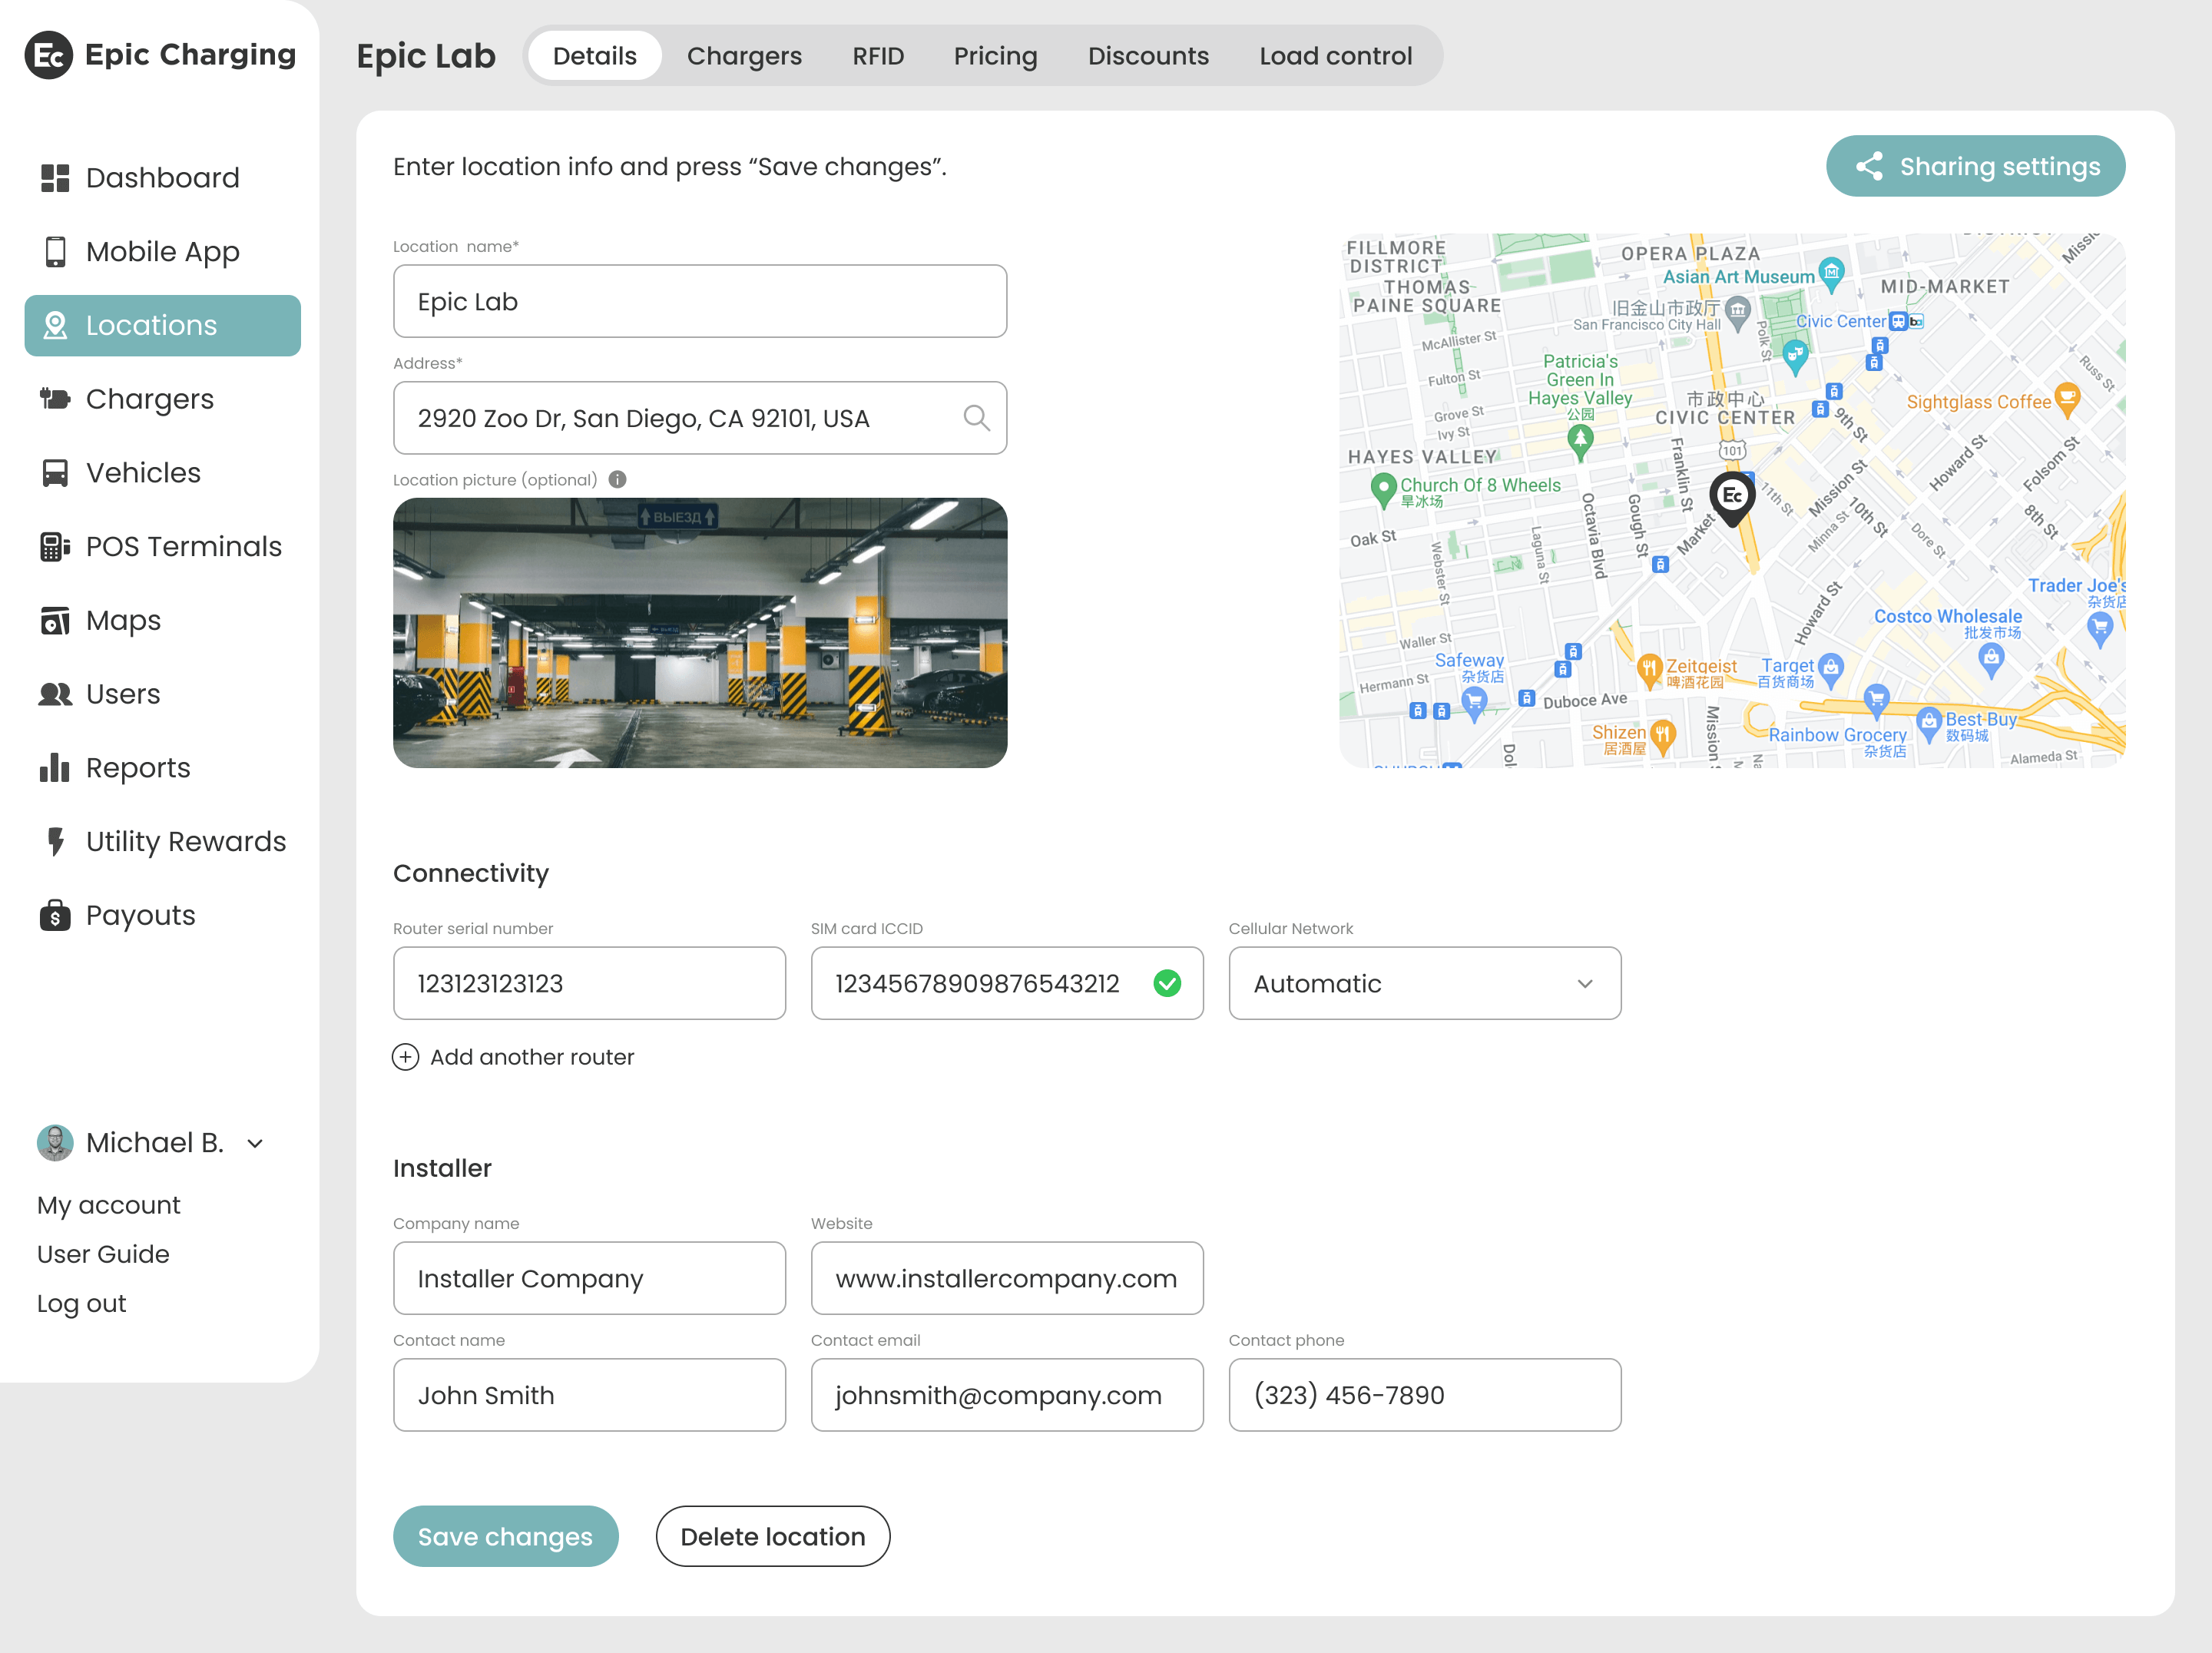
4. You will also need to enter the SIM card ICCID. A gray question mark near the SIM card number means that SIM card is not active. After the SIM card has been activated via the API, the SIM card status will automatically change to ‘active’.

5. By default, Automatic is selected as a cellular network option. If you are in the US or Canada, you can select a carrier from the dropdown menu.
6. Please note that the system displays only one set of fields for one router. You can set up to 4 routers in total by clicking on the “+ Add another router” button. Click on the trash icon near the router to delete it.
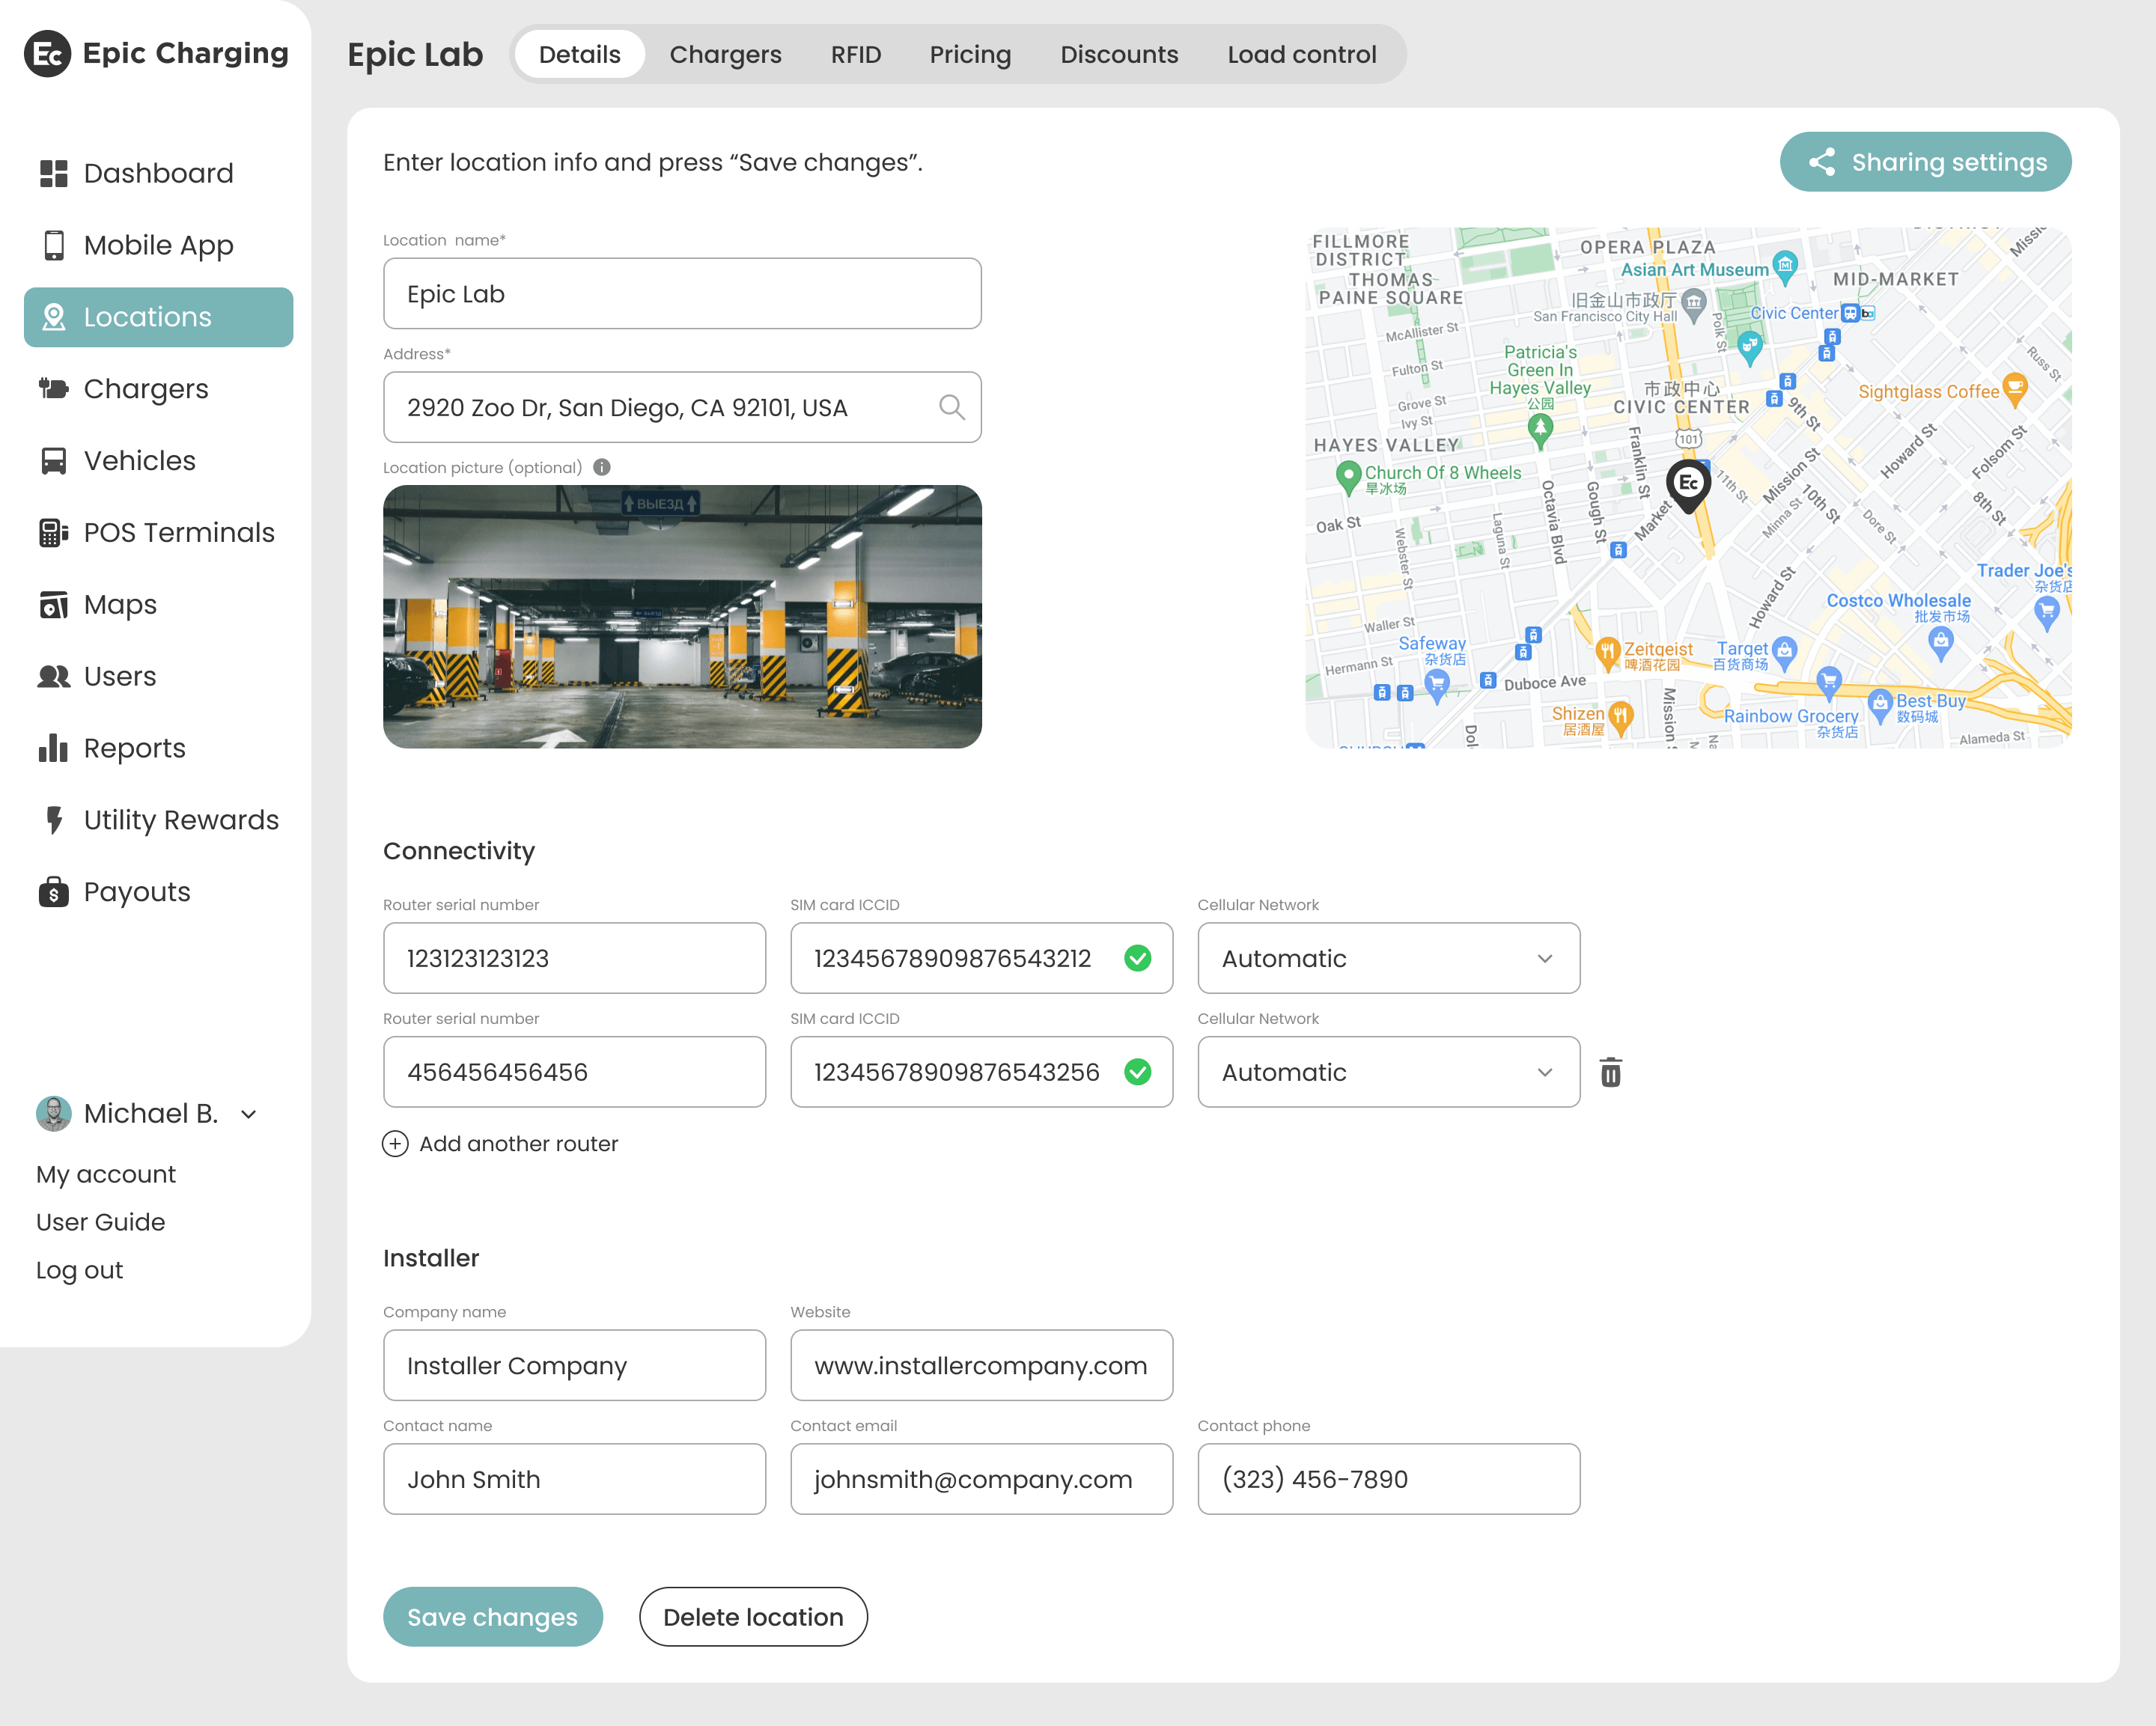
7. Click on the "Save changes" button to activate 4G connectivity for the Location.