
Epic Charging supports open-protocol (OCPP) chargers. To add a charger to your Epic account, you need to configure the Endpoint URL on the charger as follows: wss://ocpp.epiccharging.com.
1. Begin by going to the 'Locations' tab within your Epic account.
2. Click on the 'Add Location' button, select a location name, and input the address of the charger installation. Location picture is an optional field.
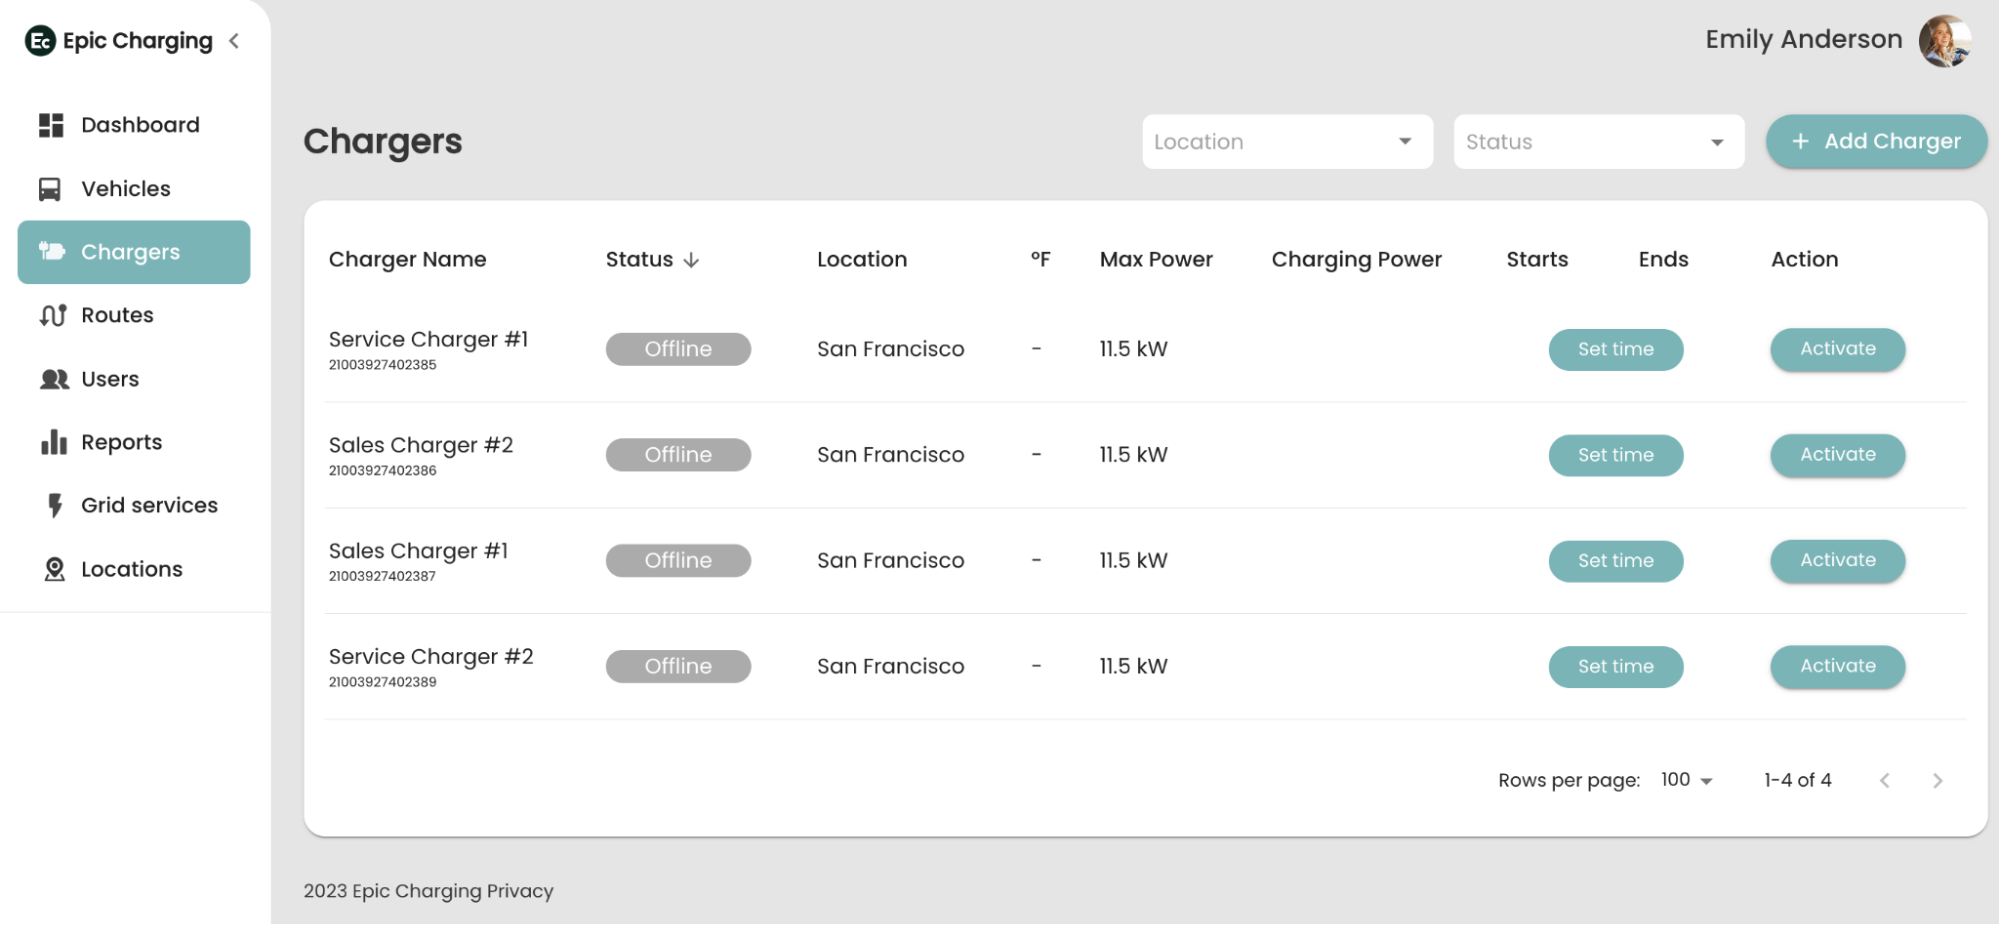
3. Next, go to the 'Chargers' tab.
4. Click on the '+ Add Charger' button.
1. Begin by going to the 'Locations' tab within your Epic account.
2. Click on the 'Add Location' button, select a location name, and input the address of the charger installation. Location picture is an optional field.
3. Next, go to the 'Chargers' tab.
4. Click on the '+ Add Charger' button.
5. Select the charger Manufacturer and Model. The system will provide suggestions for the number of ports, port maximum power, port power, and port connector type.
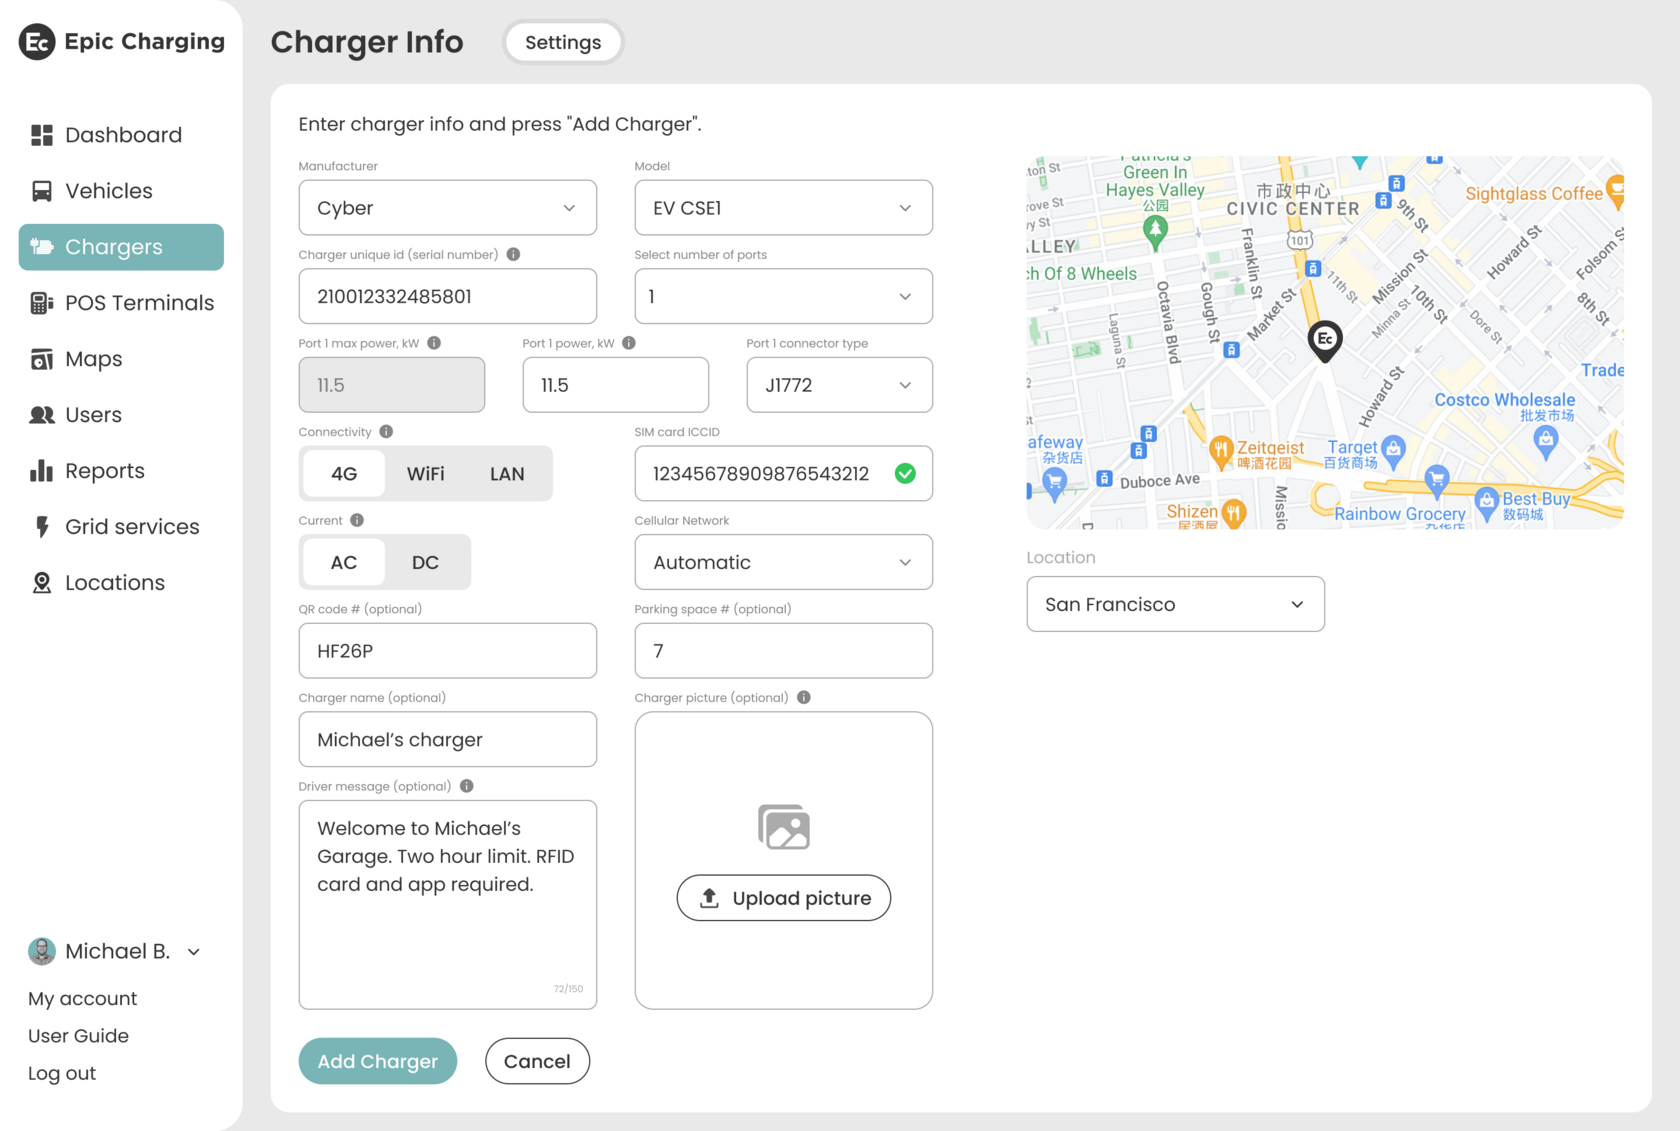
6. Enter the charger's unique ID. Usually, the charger's serial number serves as the default unique ID.
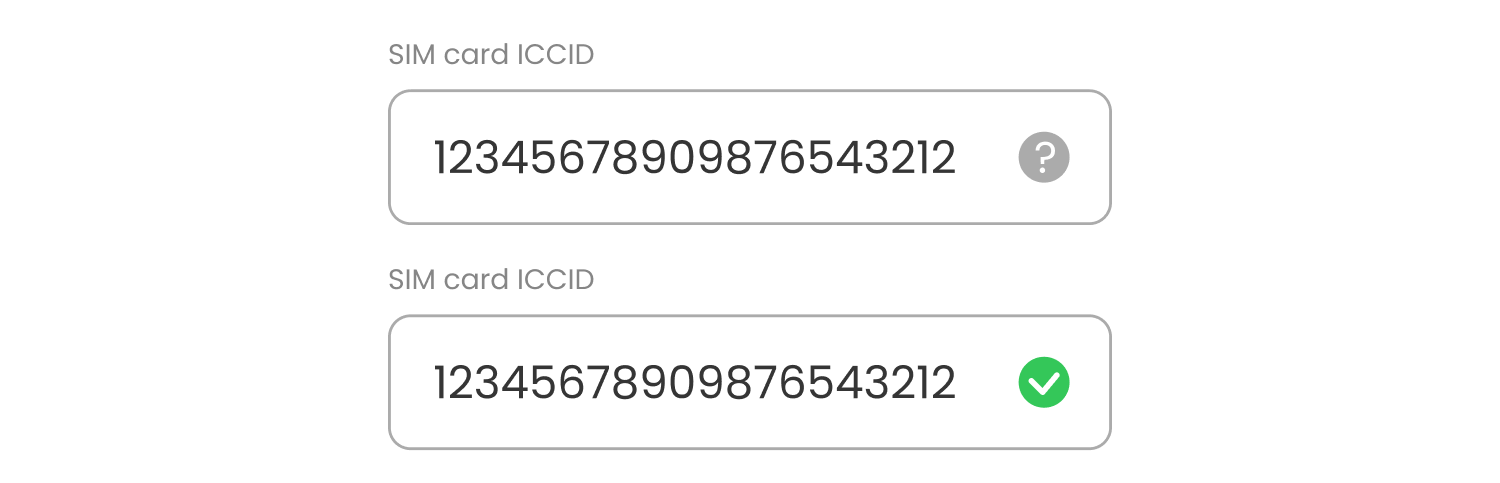
7. If you're opting for the 4G connectivity option, you will need to enter the SIM card ICCID. A gray question mark near the SIM card number means that SIM card is not active. After the SIM card has been activated via the API, the SIM card status will automatically change to ‘active’.
8. By default, Automatic is selected as a cellular network option. If you are in the US, you can select a carrier from the dropdown menu.
9. From the dropdown menu under the map, select the Location of your charger installation that was pre-configured in Step 2.
10. Fields like QR code, Parking space, Charger name, Charger picture, and Driver message are optional.
11. Click the 'Add Charger' button to save your changes.
By following these steps, you can easily add a charger to your Epic account.
See also Activating Chargers