
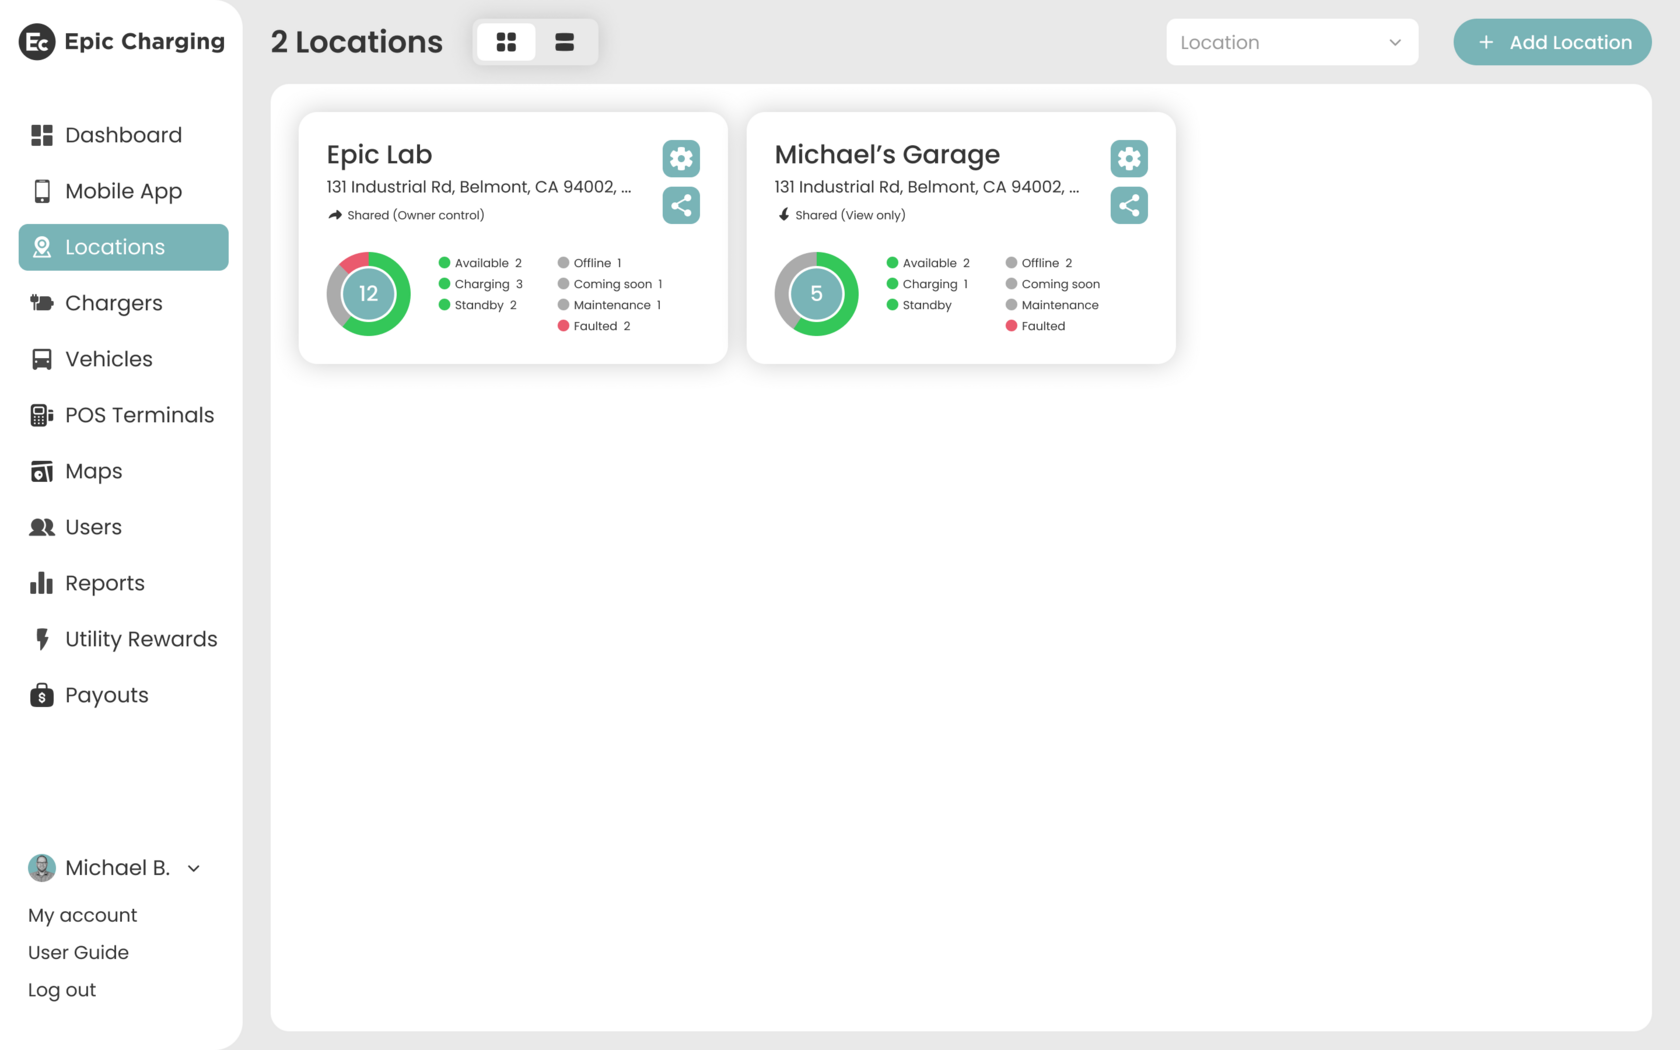
1. Begin by going to the 'Locations' tab in your Epic account. Next, choose the specific Location where you intend to add RFID cards and click on the 'Settings' icon.
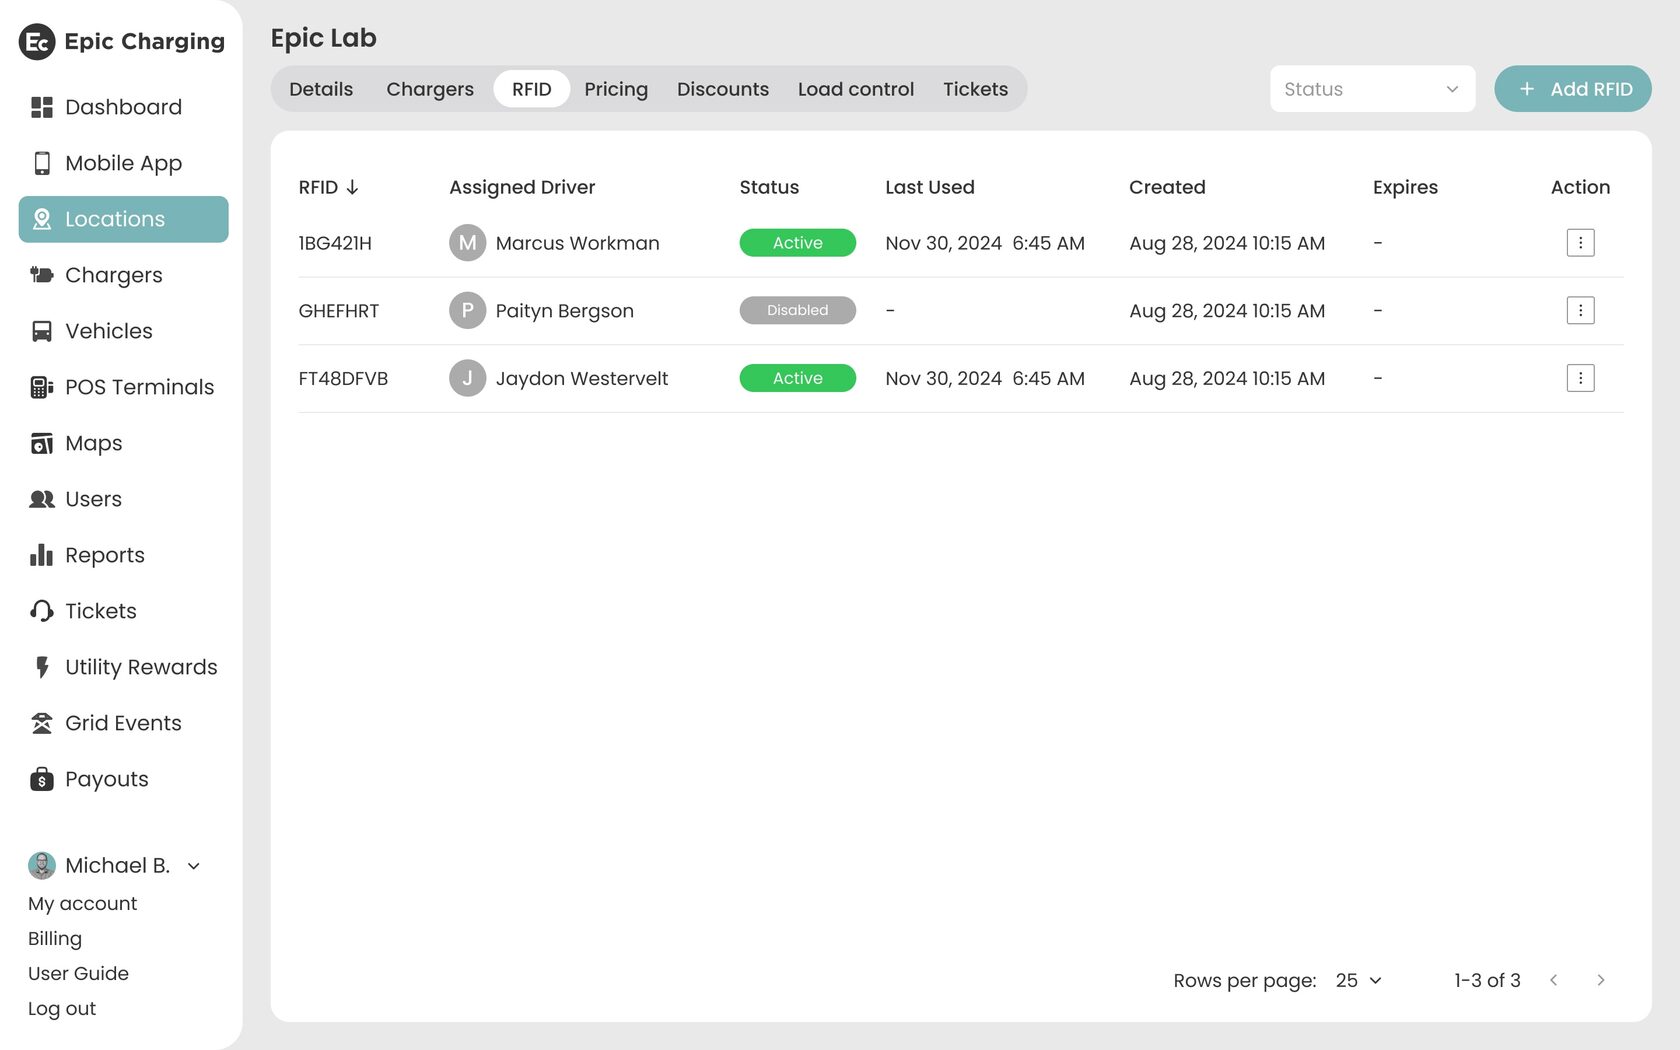
2. Click on the 'RFID' tab within the Location. Locate and click on the '+ Add RFID' button.
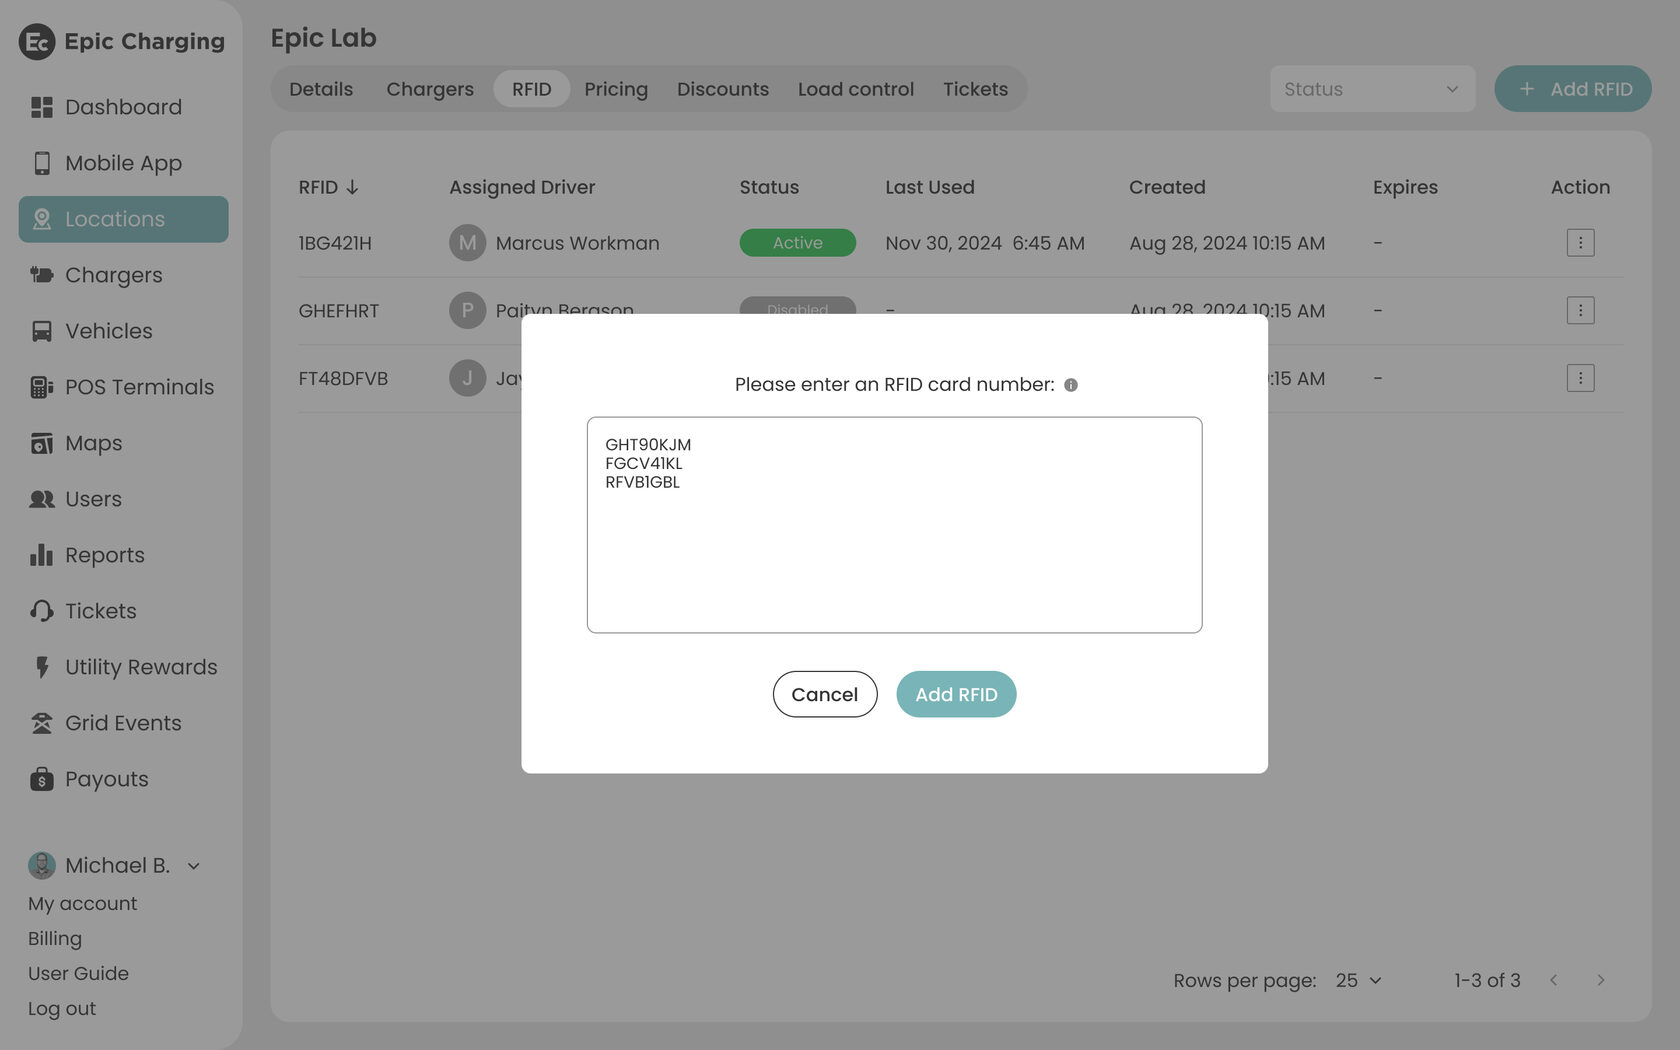
3. Input RFID card numbers in the pop-up window and click on the "Add RFID" button. This operation can be done in bulk by separating the numbers with commas or inputting them on separate lines.
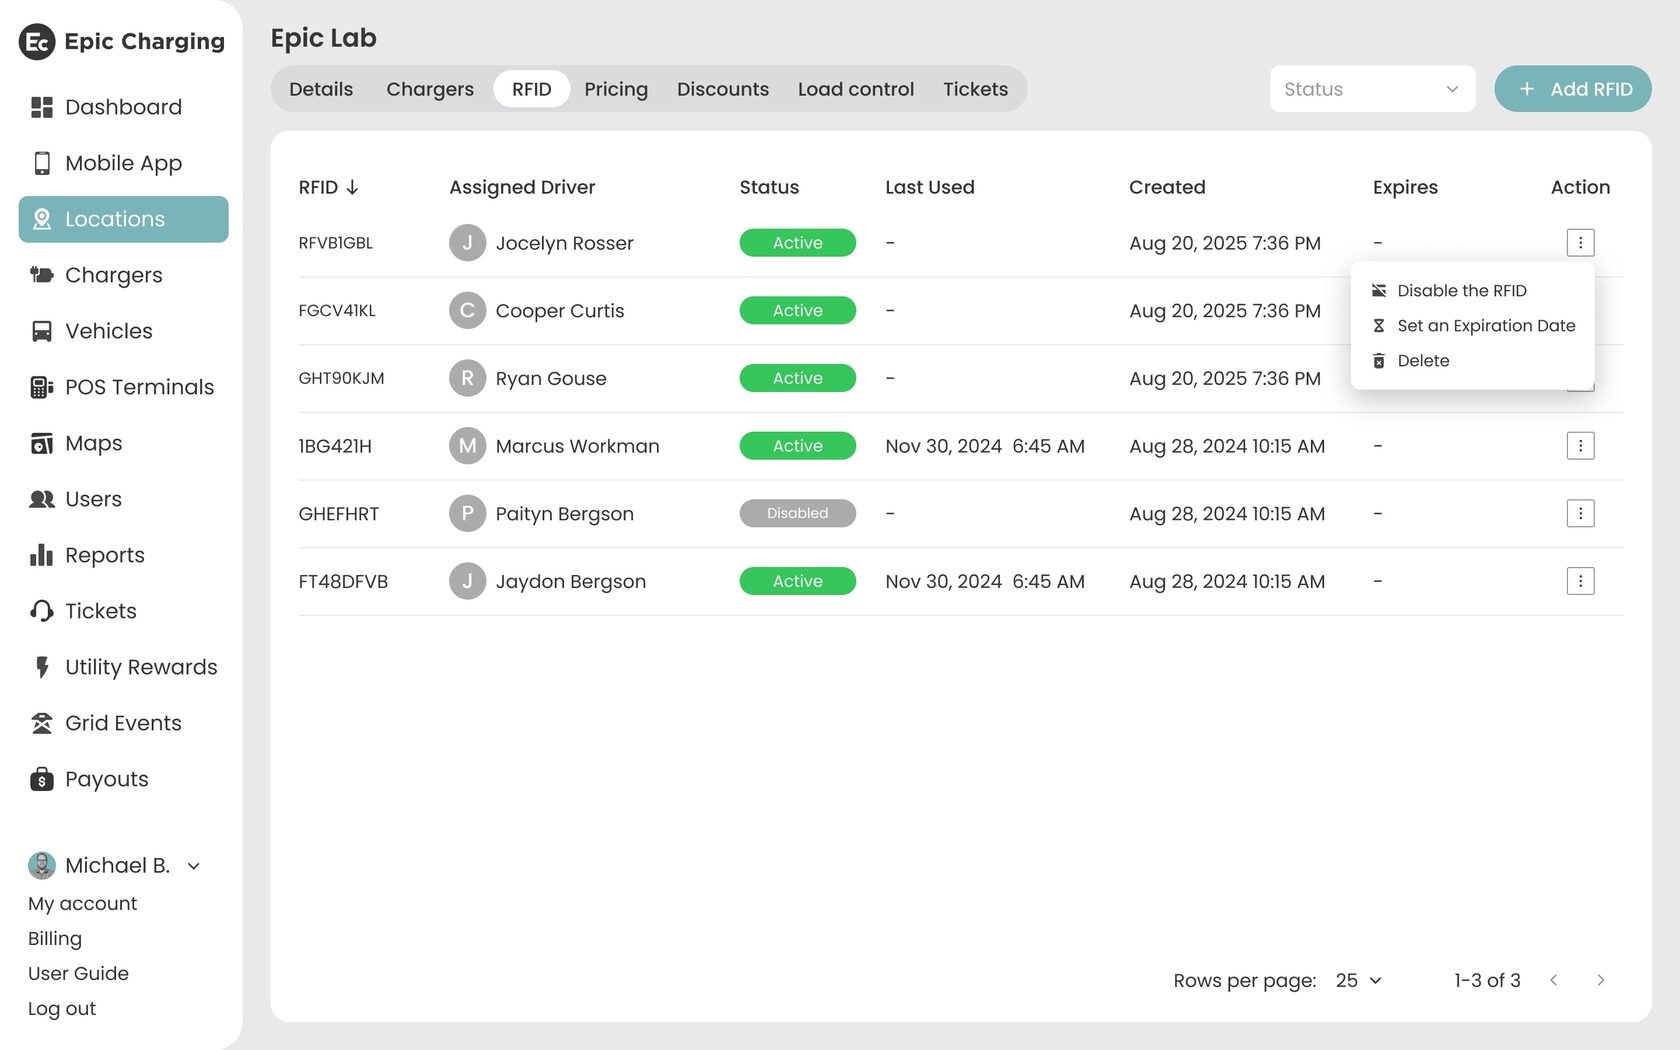
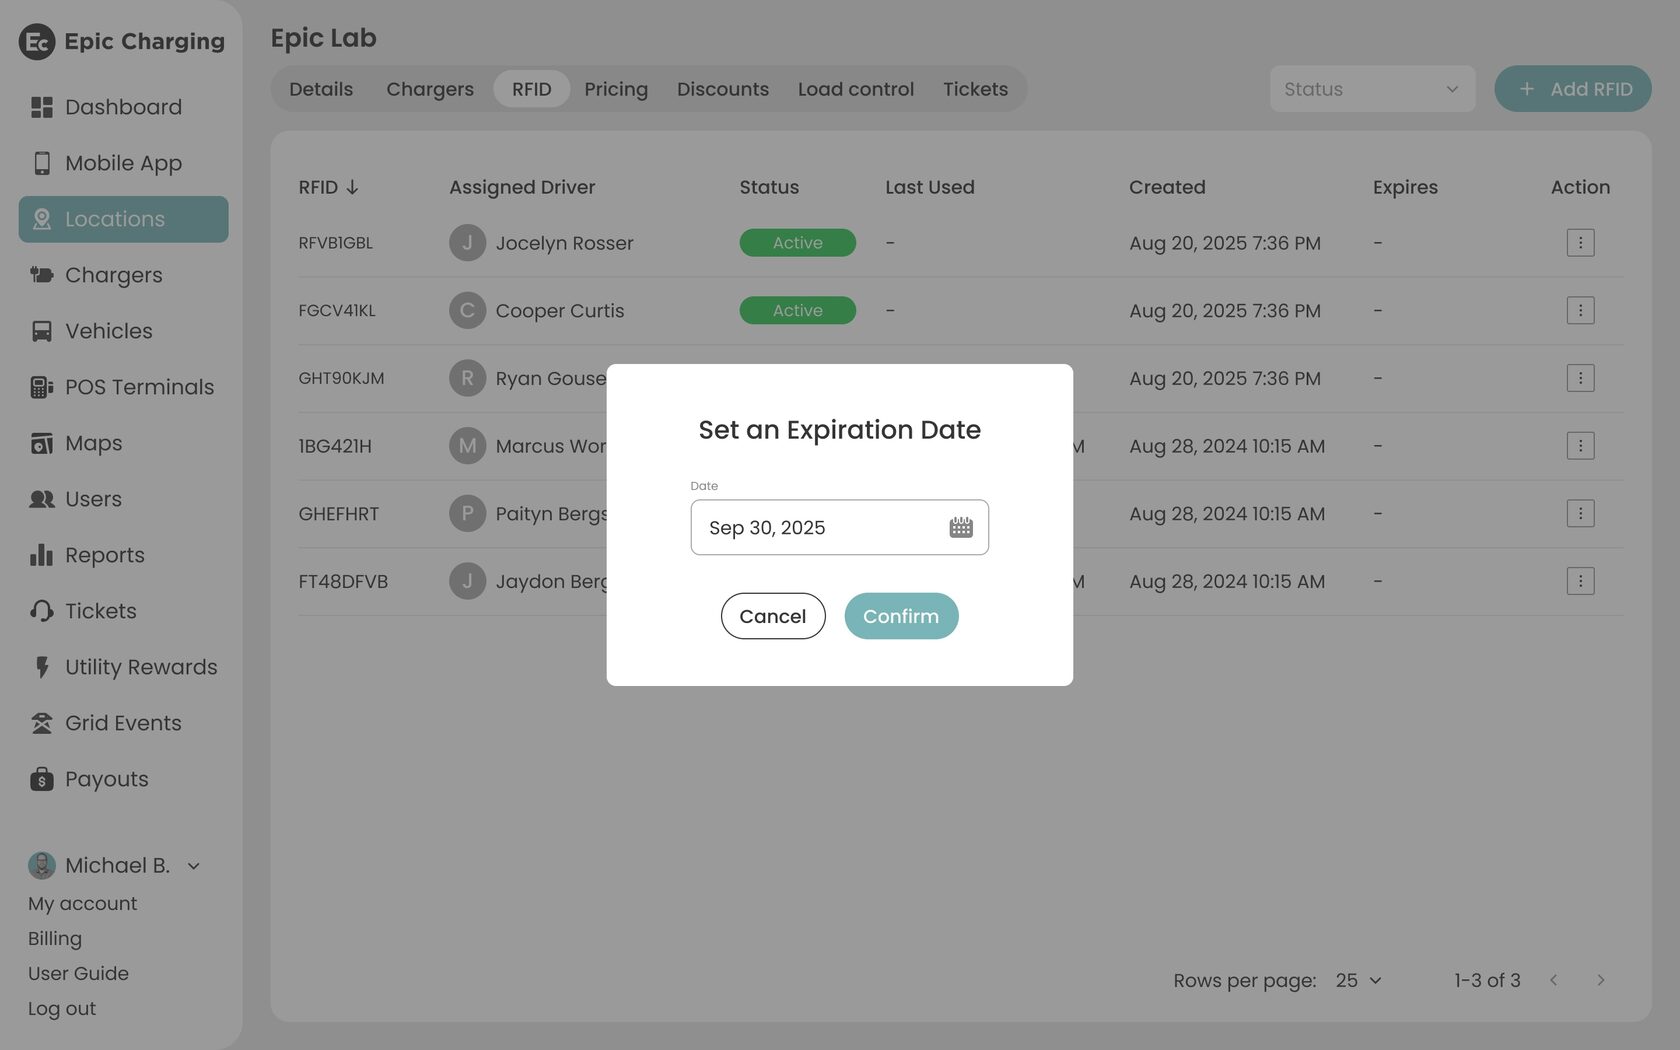
4. You can also set an expiration date for RFID cards. Click the kebab menu button (⋮) in the "Action" column and select "Set an Expiration Date" from the popup menu.
5. Select a date from the calendar in the popup window and click on the “Confirm” button.
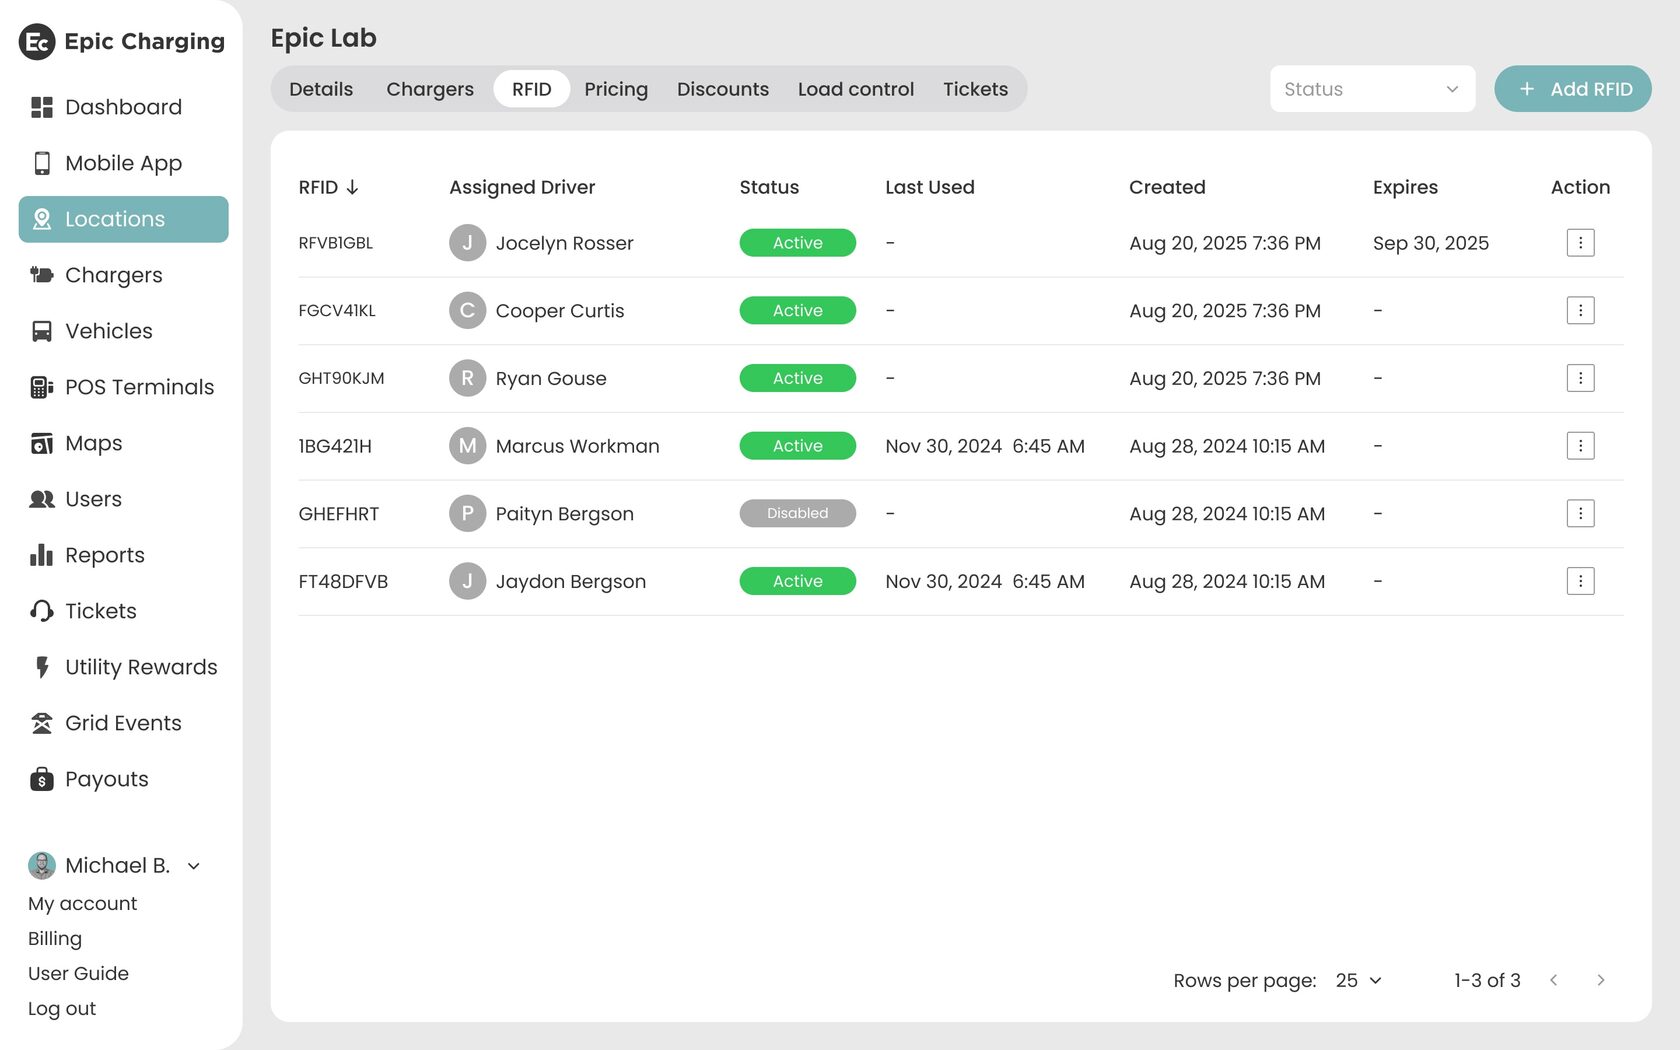
6. The selected date will be set as the expiration date for the RFID card and displayed in the “Expires” column. After the expiration date, the RFID card will automatically be marked as disabled. To extend the RFID validity period, first update the existing expiration date by following the same steps as setting a new date, and then click on the “Activate the RFID“ in the "Action" column.
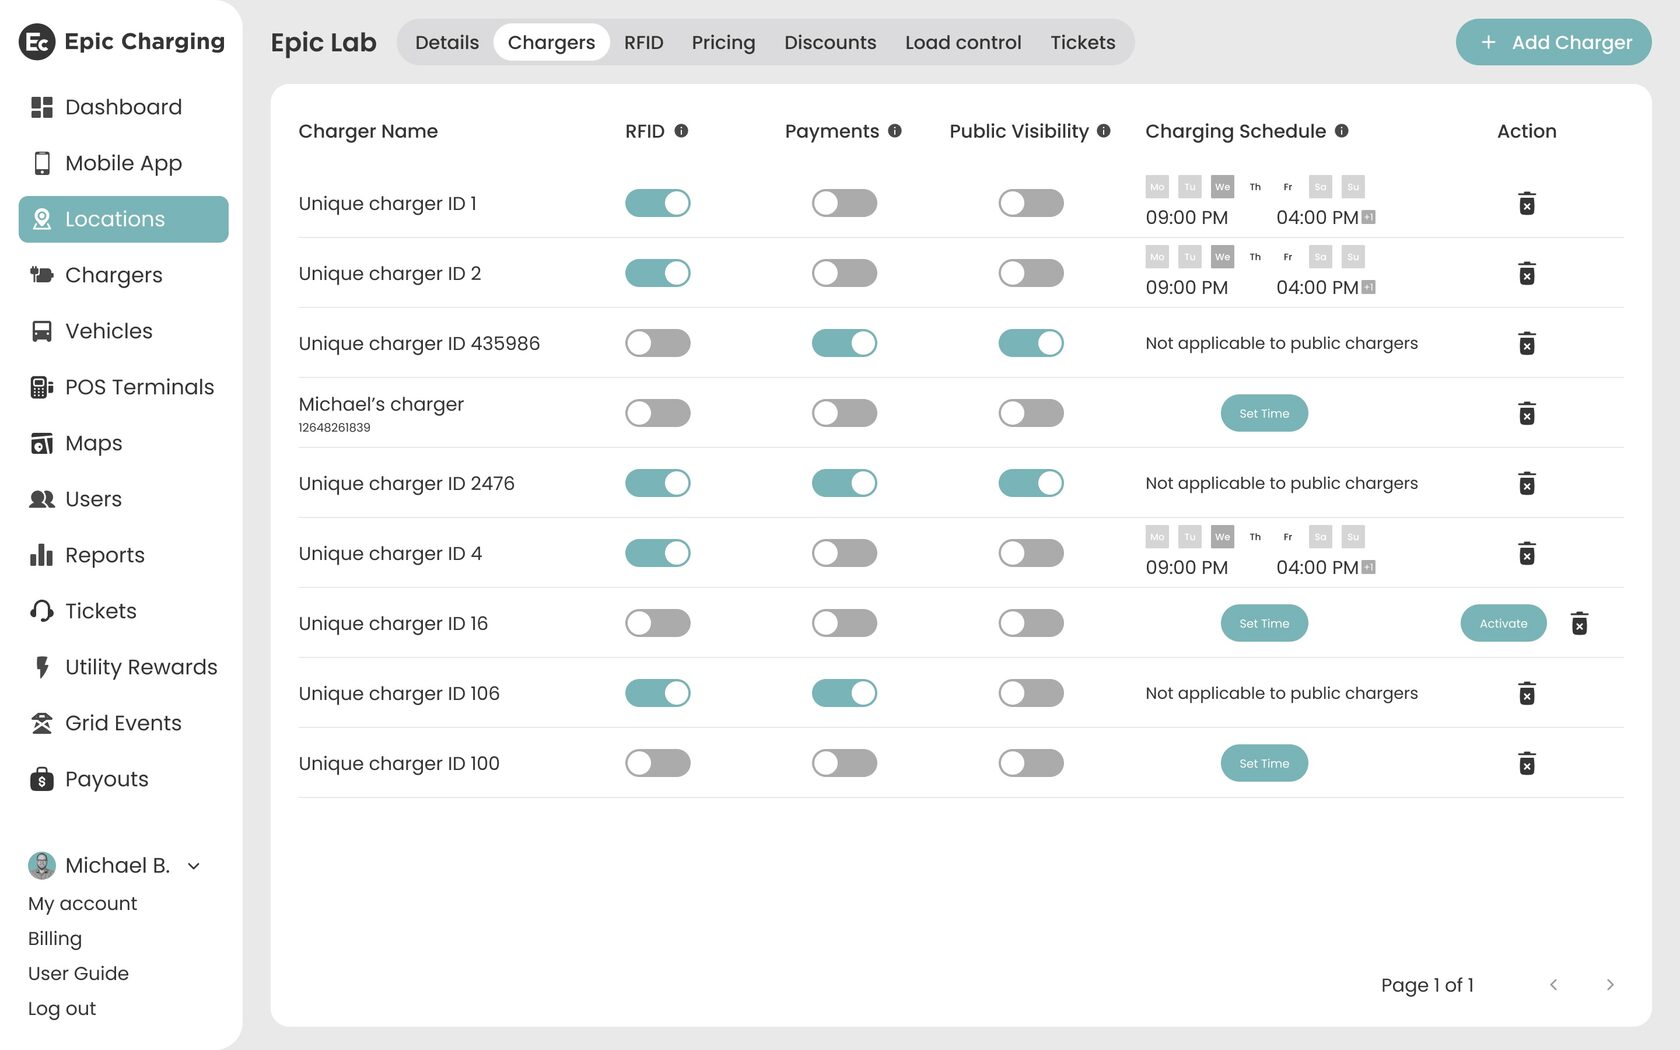
7. To restrict access to the charger, click on the 'Chargers' tab within the Location.
8. Find the charger you want to restrict access to, then activate the RFID toggle to the 'ON' position.
By following these steps, you can easily add new RFID cards to your Epic account and restrict access to the charger.