
Epic Charging provides the ability to add POS Terminals and link them with chargers.
To activate your POS Terminal, please contact support@epiccharging.com. Once the activation is confirmed, please proceed with the steps described in this user guide.
1. Start by navigating to the 'POS Terminals' tab within your Epic account.
To activate your POS Terminal, please contact support@epiccharging.com. Once the activation is confirmed, please proceed with the steps described in this user guide.
1. Start by navigating to the 'POS Terminals' tab within your Epic account.
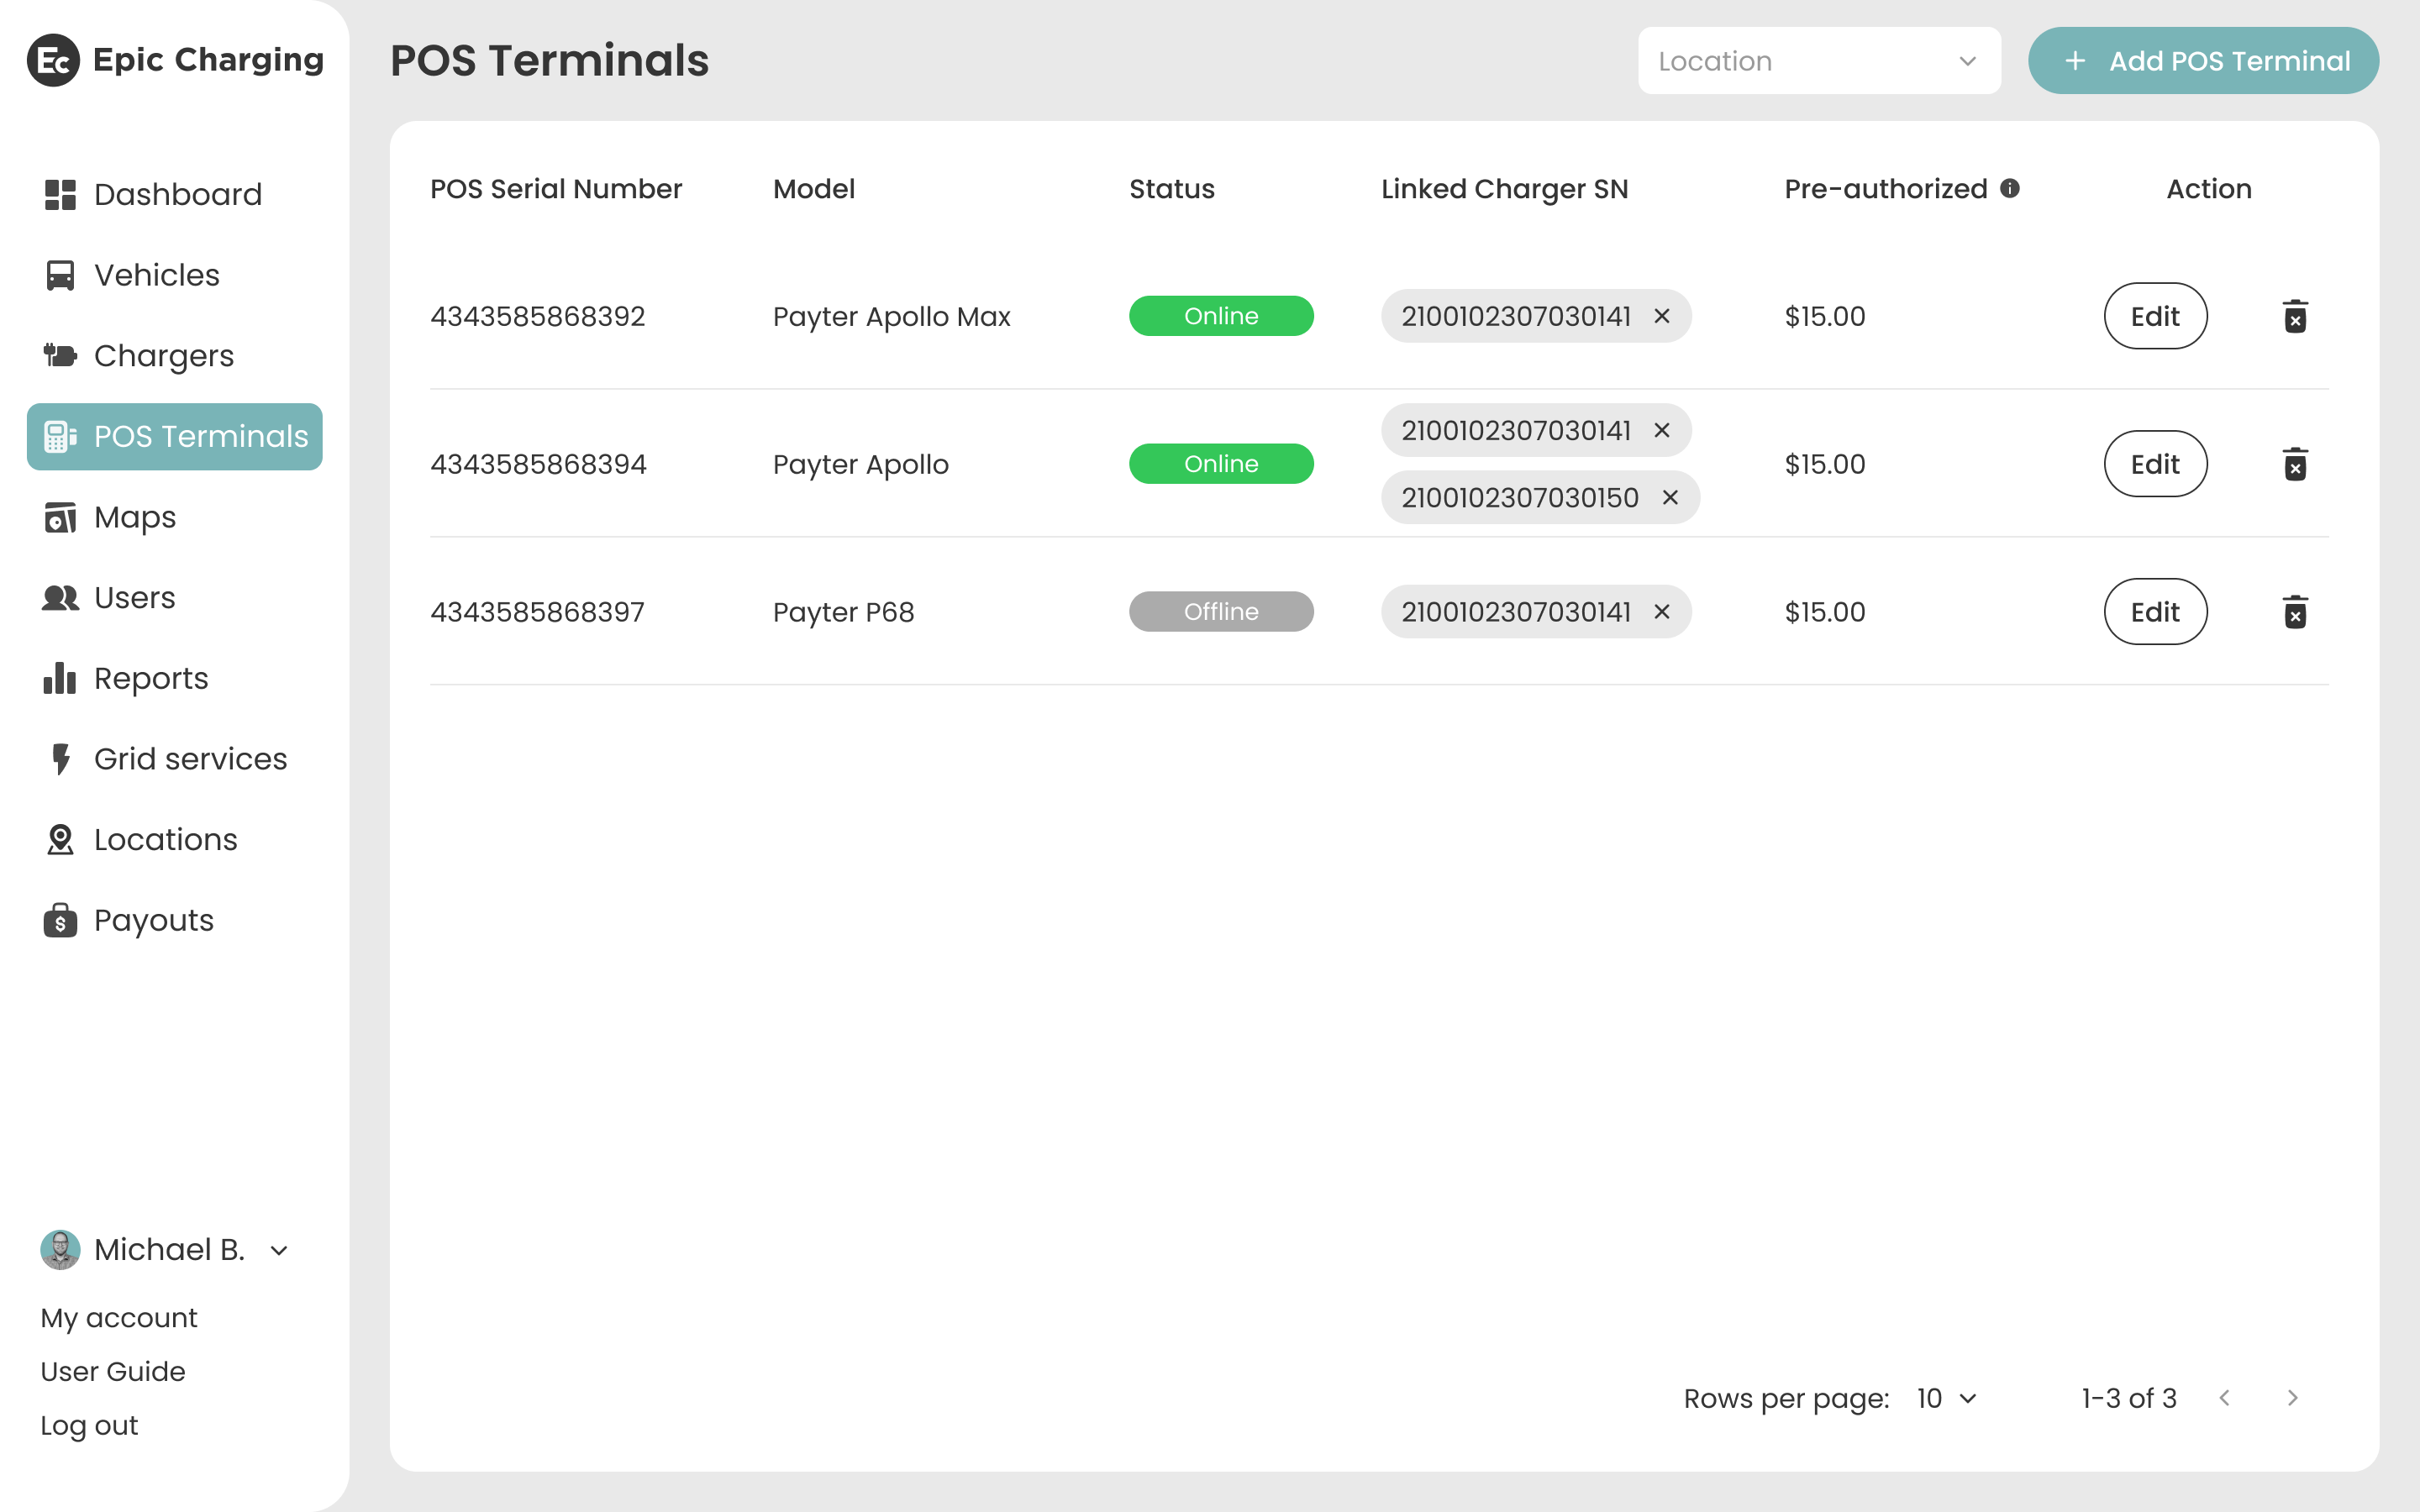
2. Click on the '+ Add POS Terminal' button.
3. Select the terminal model from the ‘Model’ dropdown and enter the POS Terminal Serial Number. From the ‘Link Charger 1’ dropdown select the serial number of the charger you want to be linked with the terminal. The terminal can be linked only with a charger with an active Epic Pro license.

4. You can link the terminal with up to two chargers. Click on the “Link another charger” button to add the ‘Link Charger 2’ dropdown, then select the serial number of the second charger you want to be linked with this terminal.

5. Click on the 'Confirm' button to add the terminal.
6. You can click on Linked Charger SN hyperlink to go to ‘Charger Info Details’. Press on the cross icon near the Linked Charger serial number to unlink the charger from the terminal. Pre-authorized amount is defined in the Linked Chargers' Location settings and is applied when activating the charging session using both the QR Code and the POS Terminal. To modify it, navigate to Locations → Select a Location → Pricing.

7. Use the ‘Edit’ button to make any changes to the POS terminal. To delete the terminal, click on the trash icon.